
Slowing down a video on your iPhone isn’t one simple trick. It depends entirely on how you shot the footage. I’ve watched people spend twenty minutes fighting a stubborn clip, only to realize the fix was choosing a different tool from the start.
Your video’s frame rate plays a major role in how smoothly it can be slowed down, while the editing tool you use also determines which speed controls are available.
Here, I’ll walk you through how to slow down a video on iPhone, using tools already on your phone. You’ll also learn why some results come out smooth while others stutter, and what that actually tells you about your video.
Check Your Video Type Before You Start
Before you learn how to edit videos on iPhone, check what type of footage you have. Not every video supports the same slow-motion options, and knowing this first helps you choose the right editing method and avoid a choppy result.
| Video Type | How It Affects Slow Motion |
|---|---|
| Slo-Mo videos | Recorded using the iPhone’s Slo-Mo mode, these clips capture extra frames for smoother slow-motion playback. |
| High frame rate videos (60 fps or higher) | These videos contain more frames that can be stretched when you reduce playback speed, helping maintain smoother movement. |
| 30 fps or lower videos | These clips have fewer frames available, so slowing them down gives the editor less motion information. This can make movement look uneven or less natural. |
| Photos app slow-motion controls | Your video’s frame rate affects the available controls. On iOS 18 and later, Photos can only slow down videos recorded above 30 fps. |
Before editing, check your clip’s recording details instead of assuming the frame rate. Imported videos may use different settings from videos recorded on your iPhone, which can affect the slow-motion options available
How to Slow Down a Video on iPhone: Photos and CapCut Method
You can slow down a video on your iPhone using the Photos app or CapCut. The right option depends on the type of video you have and how much control you want over the slow-motion effect.
Using the Photos App for Existing Videos
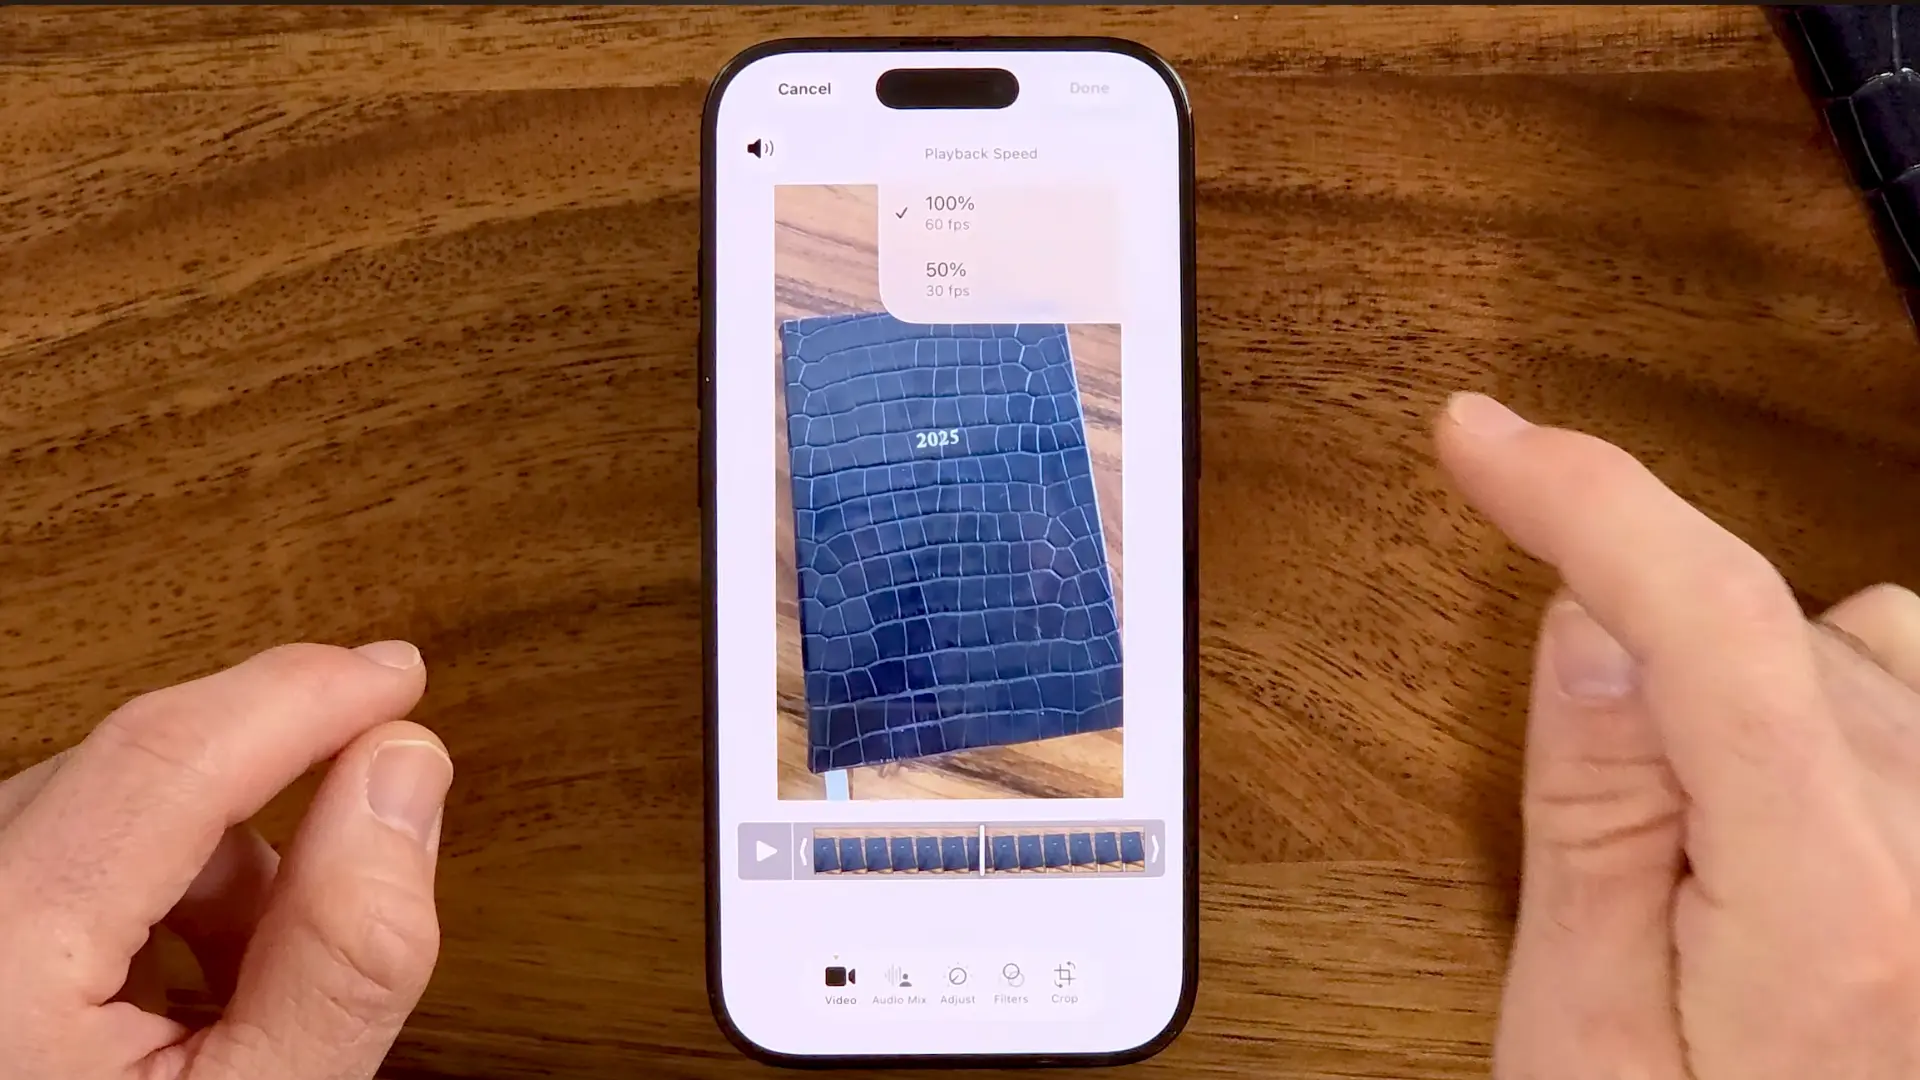
Videos recorded in Slo-Mo have separate controls that let you choose which part of the clip plays in slow motion. For high-frame-rate videos, Photos provides a separate playback-speed control.
- Open the Photos app on your iPhone and select the video you want to slow down.
- Tap Edit to open the video editing controls.
- Tap Video, then tap the Playback Speed button and select one of the available slower playback speeds. The available options depend on the format of the video you captured.
- If your clip was shot in Slo-Mo instead, skip to this step: drag the vertical white lines in the video timeline to choose where the slow-motion effect starts and ends.
- Preview the video, then tap Done to save your changes.
Slow Down an iPhone Video Using CapCut
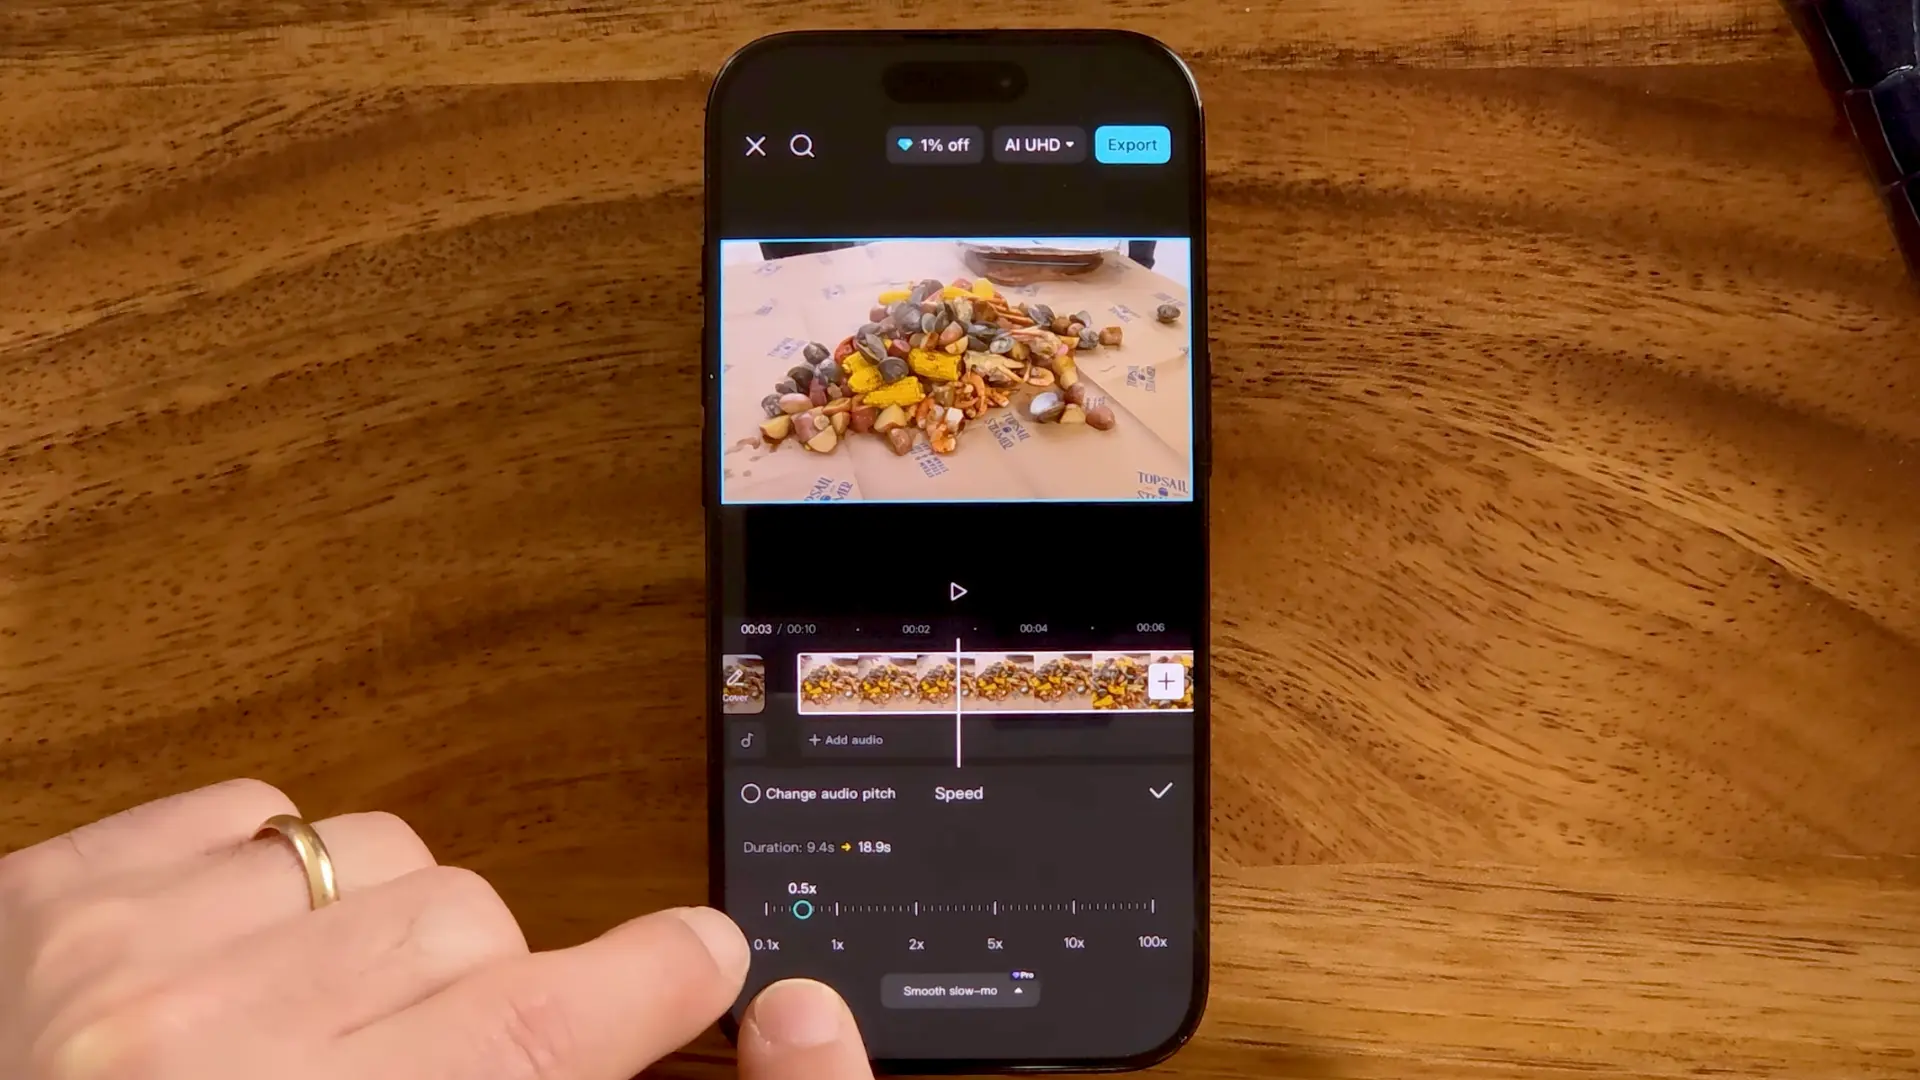
If the Photos app does not give you the speed controls you need, CapCut lets you slow down any part of a video and adjust the speed more easily.
- Download CapCut from the App Store. Open the app, tap New Video, and select the clip you want to edit from your camera roll.
- Tap the video clip to select it, then swipe through the bottom menu and choose Speed.
- Select Normal and lower the speed to options like 0.5x or 0.8x. The video will become longer because it plays at a slower rate.
- Move the playhead to where you want the slow-motion effect to start and tap Split. Move to the end of that section and split the clip again.
- Select the middle section, tap Speed, choose your preferred speed, preview the changes, and tap Export to save the edited video.
For a complete walkthrough of the process, check out the video tutorial below:
How to Slow Down a Video on iPhone Using iMovie
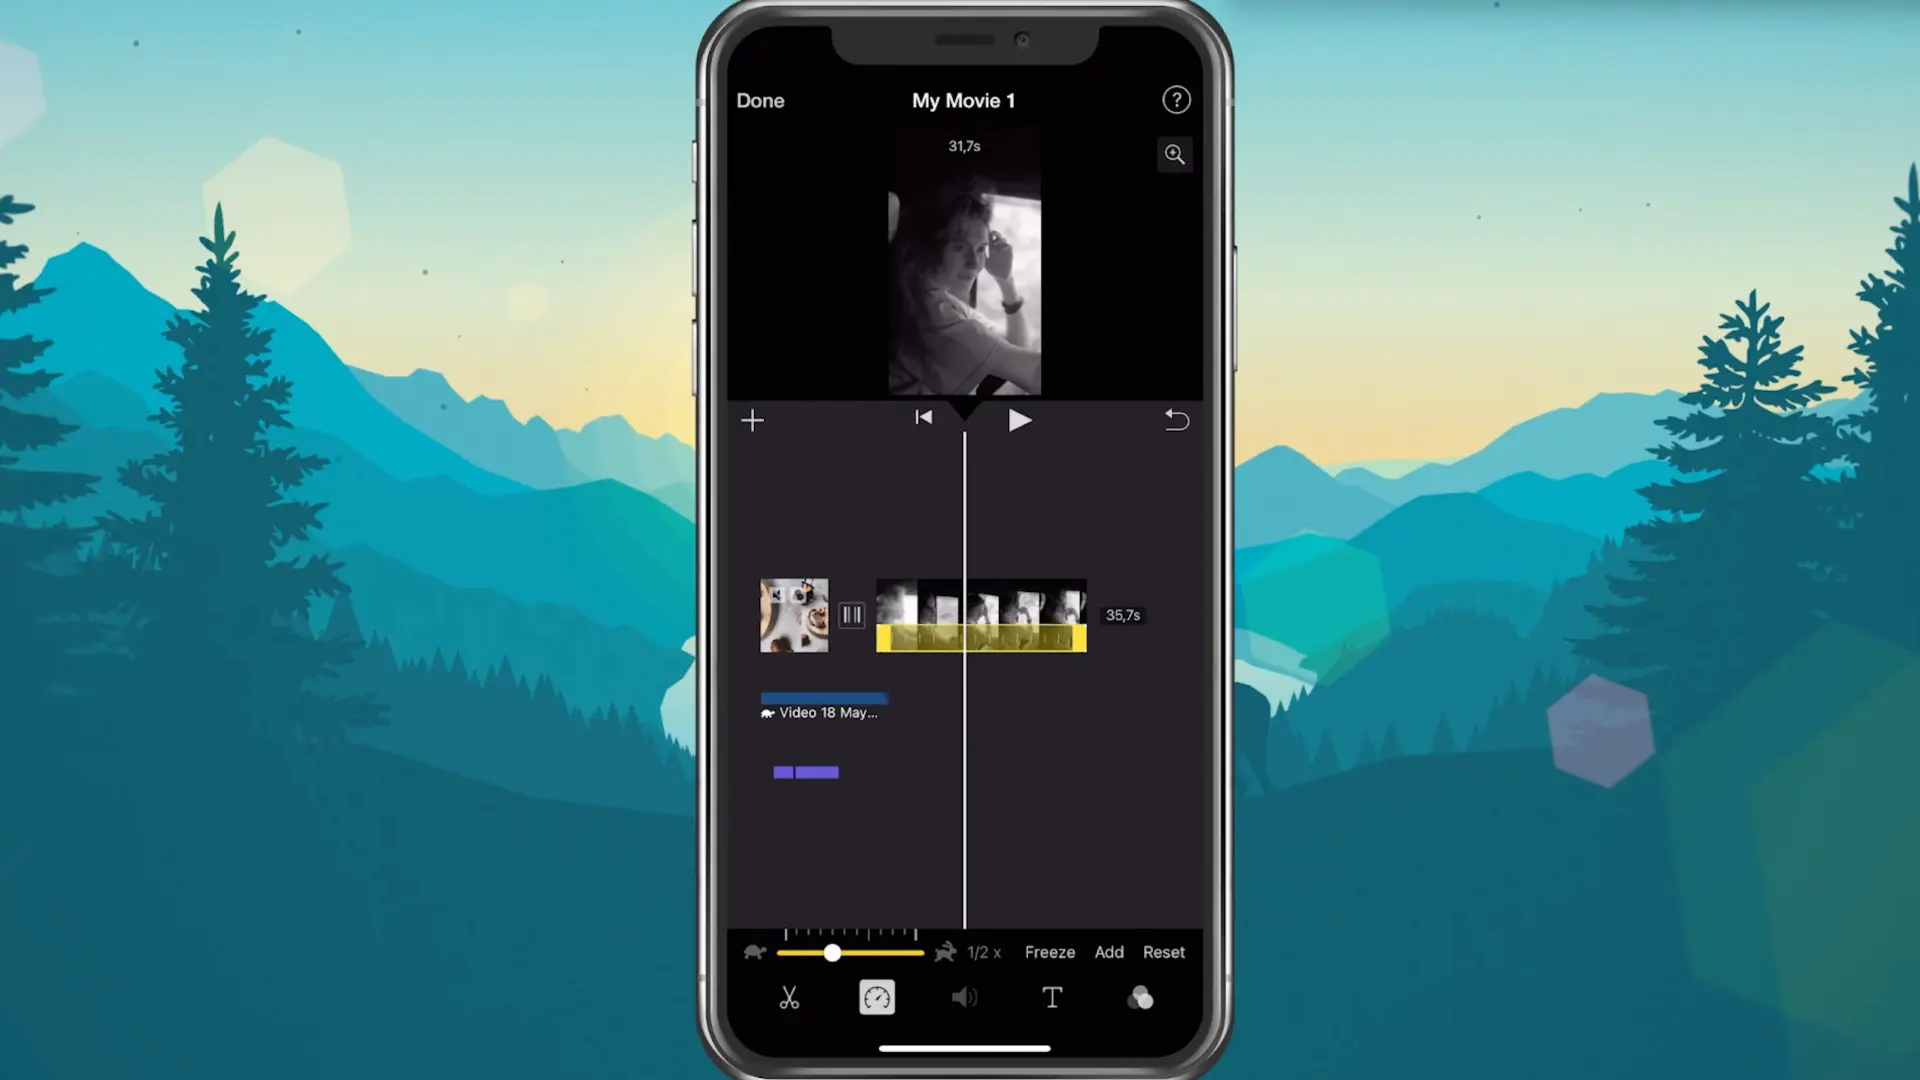
If the Photos app does not give you enough speed controls, iMovie is a free option that works with regular videos. It lets you slow down the entire clip or only a specific section.
Follow these steps:
- Open iMovie on your iPhone.
- Tap Start New Project, then tap Movie.
- Select the video clips you want to use and tap Create Movie at the bottom of the screen.
- Tap the clip in the timeline to select it. This opens the inspector at the bottom of the screen.
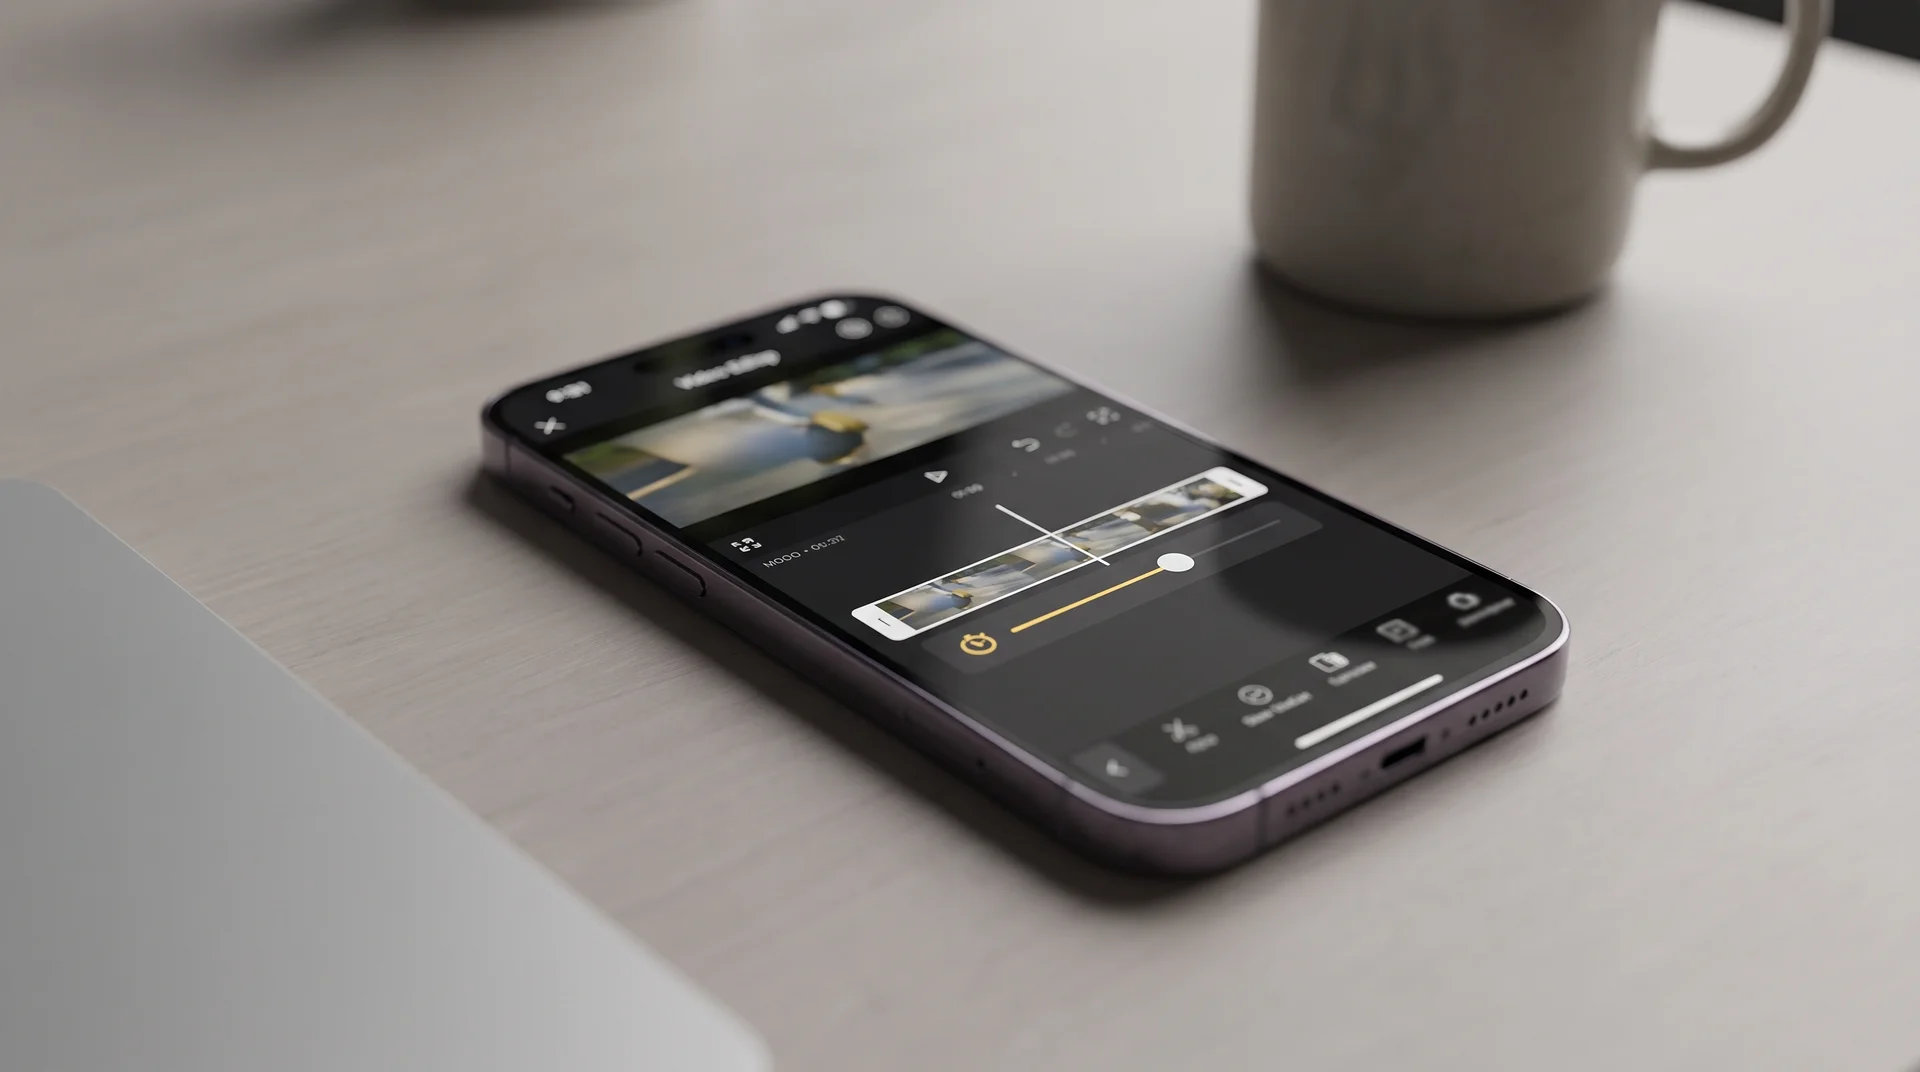
- Tap the Speed button (it looks like a speedometer).
- A yellow bar with range handles appears on the clip. Drag the slider left to slow the clip down. To slow only part of the clip, drag one of the yellow range handles first to mark that section before adjusting the slider.
- As you drag, iMovie shows the relative speed below the clip (like 1/2x for half speed).
- Preview the clip, then tap anywhere outside the inspector when you’re happy with it.
- Tap the Share button and choose Save Video to export the clip back to Photos
If you only want to slow down part of a video, use the yellow range handles to select the section you want to edit. You can apply the slower speed to that section while keeping the rest at normal speed.
Why Your Slow-Motion Video Looks Choppy or Has Bad Audio
A slowed-down video may not always look smooth because the result depends on the original frame rate and how much you reduce the speed.
Higher frame rate videos, such as 60 FPS, 120 FPS, or 240 FPS, usually create smoother slow-motion results because they have more frames to work with, though those extra frames also mean larger files, so backing up bulky video files is worth planning for.
The difference is more noticeable with 30 FPS video. It can still be slowed down, but reducing the speed too much can make movement look uneven or choppy because there is less motion data available.
If you want smoother results from lower frame rate footage, some editing apps use frame interpolation to add extra frames between existing ones. This can make slow-motion playback look smoother, but it may not look as natural as footage recorded at a higher frame rate.
Slowing a video does not automatically change the audio pitch in iMovie. By default, iMovie preserves audio pitch when clips are sped up or slowed down.
You can turn on Speed changes pitch in Project Settings if you want the pitch to change with playback speed.
Before exporting the final video, preview the slowed-down clip from start to finish. This helps you catch choppy sections, timing problems, or audio issues and adjust the speed before saving it.
Conclusion
Knowing how to slow down a video on iPhone really comes down to one thing: matching the tool to your footage.
I’d say the biggest shift happens once you understand frame rate. It turns “why does this look weird” into a problem you can actually predict and avoid.
Next time you’re filming something you might want to slow down later, switch to Slo-Mo before you hit record. That one habit saves you the editing headache entirely.
Tried one of these methods? Drop a comment and let me know how your slow-motion edit turned out.
Frequently Asked Questions
Can I slow down a video that wasn’t recorded in Slo-Mo?
Yes. On iOS 18 and later, Photos can slow videos recorded above 30 FPS. For other videos, iMovie can reduce playback speed regardless of how the footage was recorded.
What frame rate does iPhone Slo-Mo actually record at?
By default, iPhone records Slo-Mo at 240 fps from the back camera and 120 fps from the front camera. You can switch the back camera to 120 fps instead in Settings > Camera > Record Slo-mo, and on Pro models, Slo-Mo can also be captured in 4K at up to 120 fps.
What’s the difference between iMovie and CapCut for slowing down video?
Both can slow video clips and adjust playback speed. iMovie is Apple’s editor with speed controls and range adjustments, while CapCut offers Normal and Curve speed controls for more flexible editing.