
Building a PC can look intimidating when the motherboard, processor, graphics card, and cables are spread across a table. The good news is that learning how to build a PC is mostly about following the right order and checking compatibility before you start.
You do not need advanced technical skills or special tools. Most parts are designed to fit only where they belong, and a Phillips screwdriver handles much of the assembly.
The key is to work slowly, use the motherboard manual when connectors are unclear, and test the system before finishing cable management. By the end, you will know how to assemble the parts, complete the first boot, and avoid common beginner mistakes.
How to Build a PC
Building a PC follows a simple sequence: choose compatible parts, prepare the motherboard, mount the main components, connect power and case cables, install the graphics card, and test the system before closing the case.
Start by installing the CPU, RAM, and M.2 SSD on the motherboard while it is outside the case. Then prepare the case, check the standoffs, mount the motherboard, and install the CPU cooler, fans, and power supply.
After that, connect the 24-pin motherboard cable, CPU power cable, front-panel connectors, storage cables, and GPU power.
Once the hardware is assembled, connect a monitor and keyboard, start the PC, and enter the BIOS to confirm the CPU, memory, storage, cooling, and fans are detected. Finish by installing the operating system, motherboard drivers, graphics drivers, and system updates.
Parts You Need to Build a PC
Before buying anything, decide what the computer needs to do. A gaming system, work PC, and basic everyday computer may use different CPUs, graphics cards, storage capacities, and cooling setups, but the core components remain similar.
| Component | Purpose | What to Check |
|---|---|---|
| CPU | Handles processing tasks | Motherboard socket support |
| Motherboard | Connects major components | CPU, RAM, case, and storage support |
| RAM | Provides working memory | DDR type and motherboard compatibility |
| Storage | Stores Windows, apps, and files | M.2 or SATA support |
| CPU Cooler | Removes heat from CPU | CPU socket and case clearance |
| Power Supply | Supplies power | Wattage and required connectors |
| PC Case | Holds the components | Motherboard, GPU, and cooler size |
| Graphics Card | Handles graphics workloads | Case clearance and PSU support |
| Case Fans | Move air through the system | Fan size, mounting points, and headers |
A graphics card is only part of the list when the chosen build requires one, and once it’s running, it helps to know what counts as a normal temperature range so you can judge whether your cooling setup is doing its job. Case fans may also already be included with the case.
Check PC Compatibility Before Building
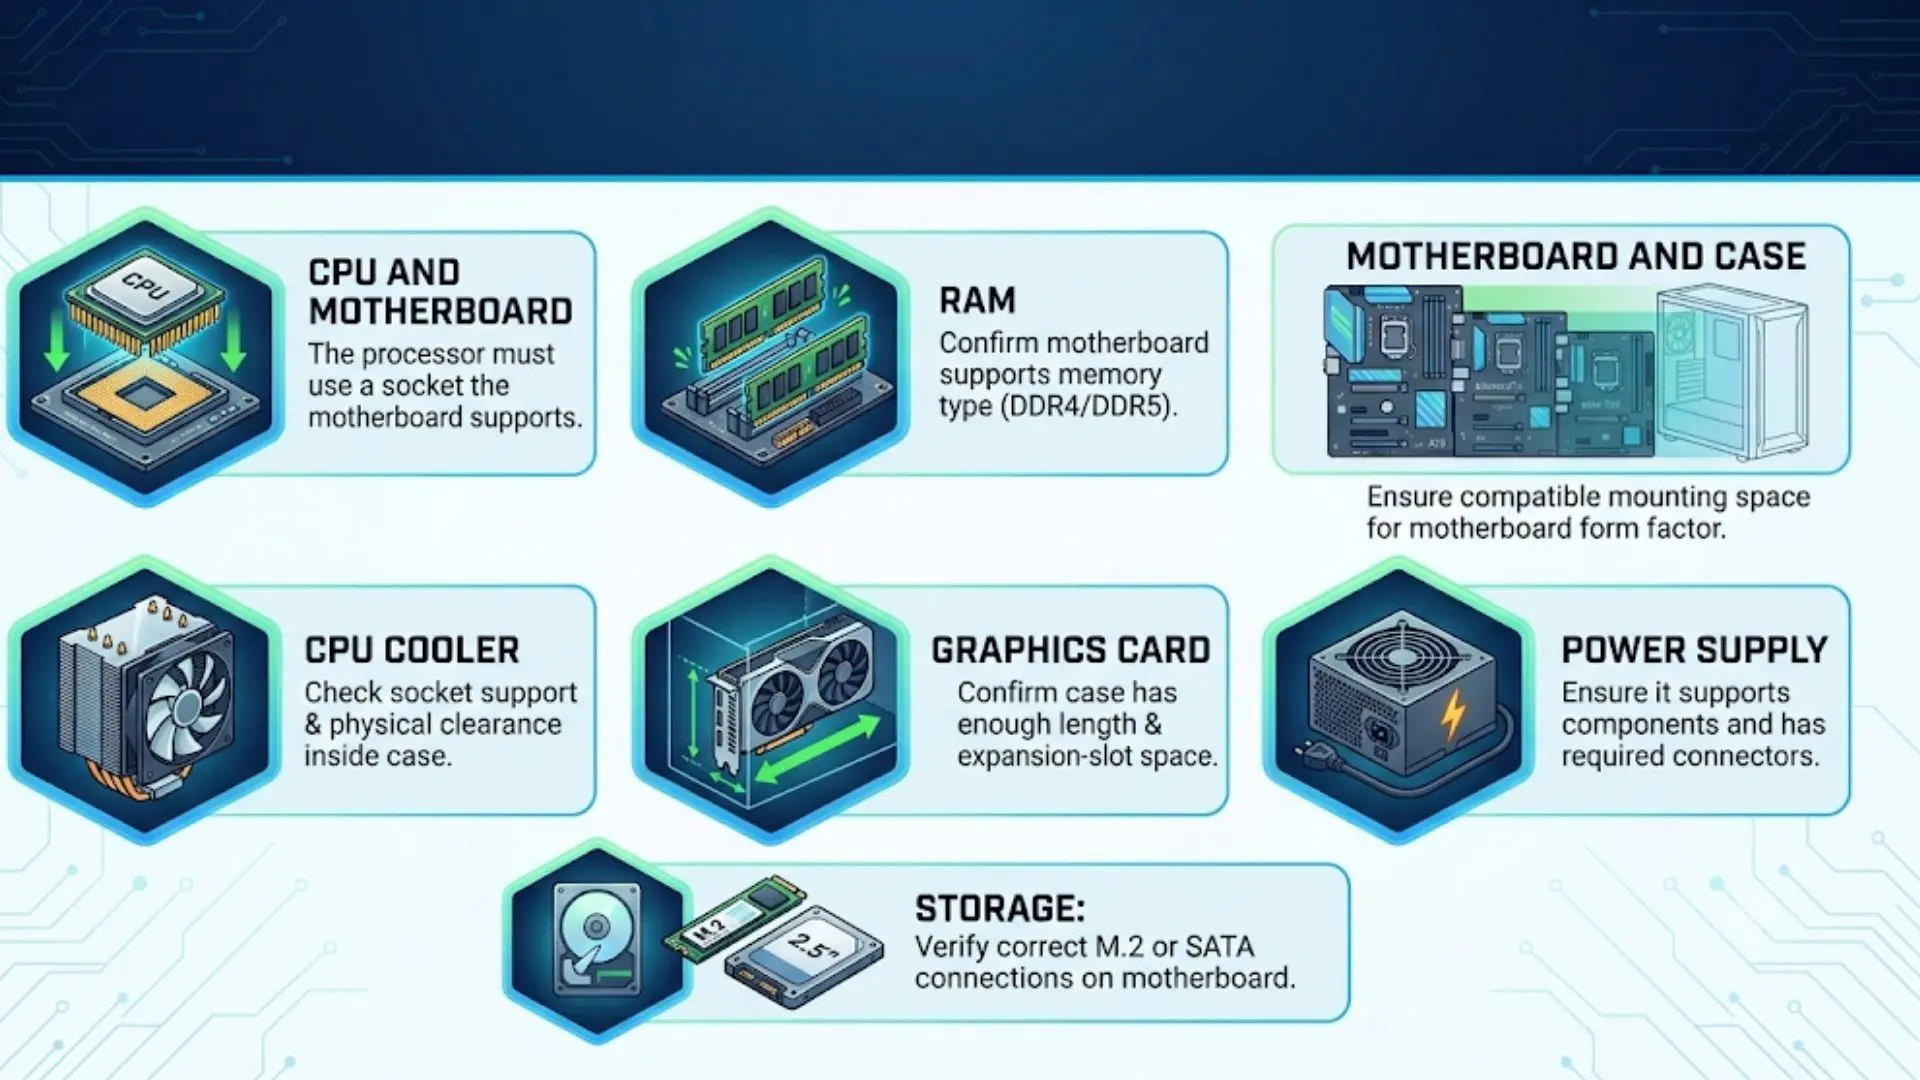
Confirm compatibility before ordering components. It is much easier to correct a parts list than to realize during assembly that the CPU does not fit the motherboard or the graphics card is too large for the case.
Check these areas first:
- CPU and motherboard: The processor must use a socket the motherboard supports.
- RAM: Confirm that the motherboard supports the memory type being purchased.
- Motherboard and case: ATX, Micro-ATX, and other motherboard sizes require compatible mounting space.
- CPU cooler: Check both socket support and physical clearance inside the case.
- Graphics card: Confirm that the case has enough length and expansion-slot clearance.
- Power supply: Make sure it can support the components and provides the required power connectors.
- Storage: Verify that the board has the correct M.2 or SATA connections.
Checking these details before assembly prevents many of the problems beginners face later.
How to Build a PC Step by Step
With the components checked and workspace prepared, assembly can begin. Keeping the steps in order makes cable routing easier and reduces the chance of having to remove installed hardware later.
Tools and Workspace You Need
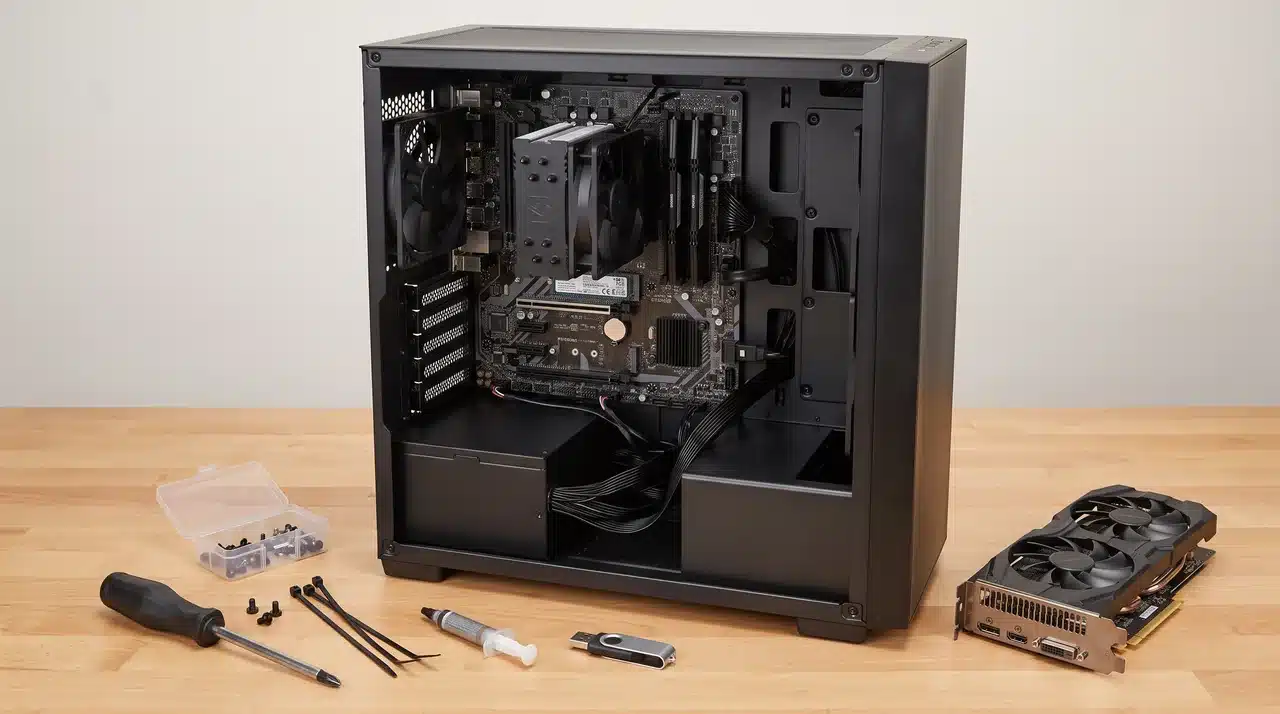
PC building does not require a large collection of professional tools. A few basic items are enough for most standard systems.
Useful tools include:
- #2 Phillips-head screwdriver
- Small precision screwdriver for some M.2 screws
- Small container for keeping screws organized
- Zip ties or Velcro straps
- Small cutters for trimming zip ties
- Thermal paste if it is not pre-applied
- USB flash drive with the operating system installer
- Clean, well-lit work surface
Place the motherboard on top of its cardboard box while installing the first components. This creates a stable surface and protects the underside of the board.
Step 1: Install the CPU, RAM, and M.2 SSD
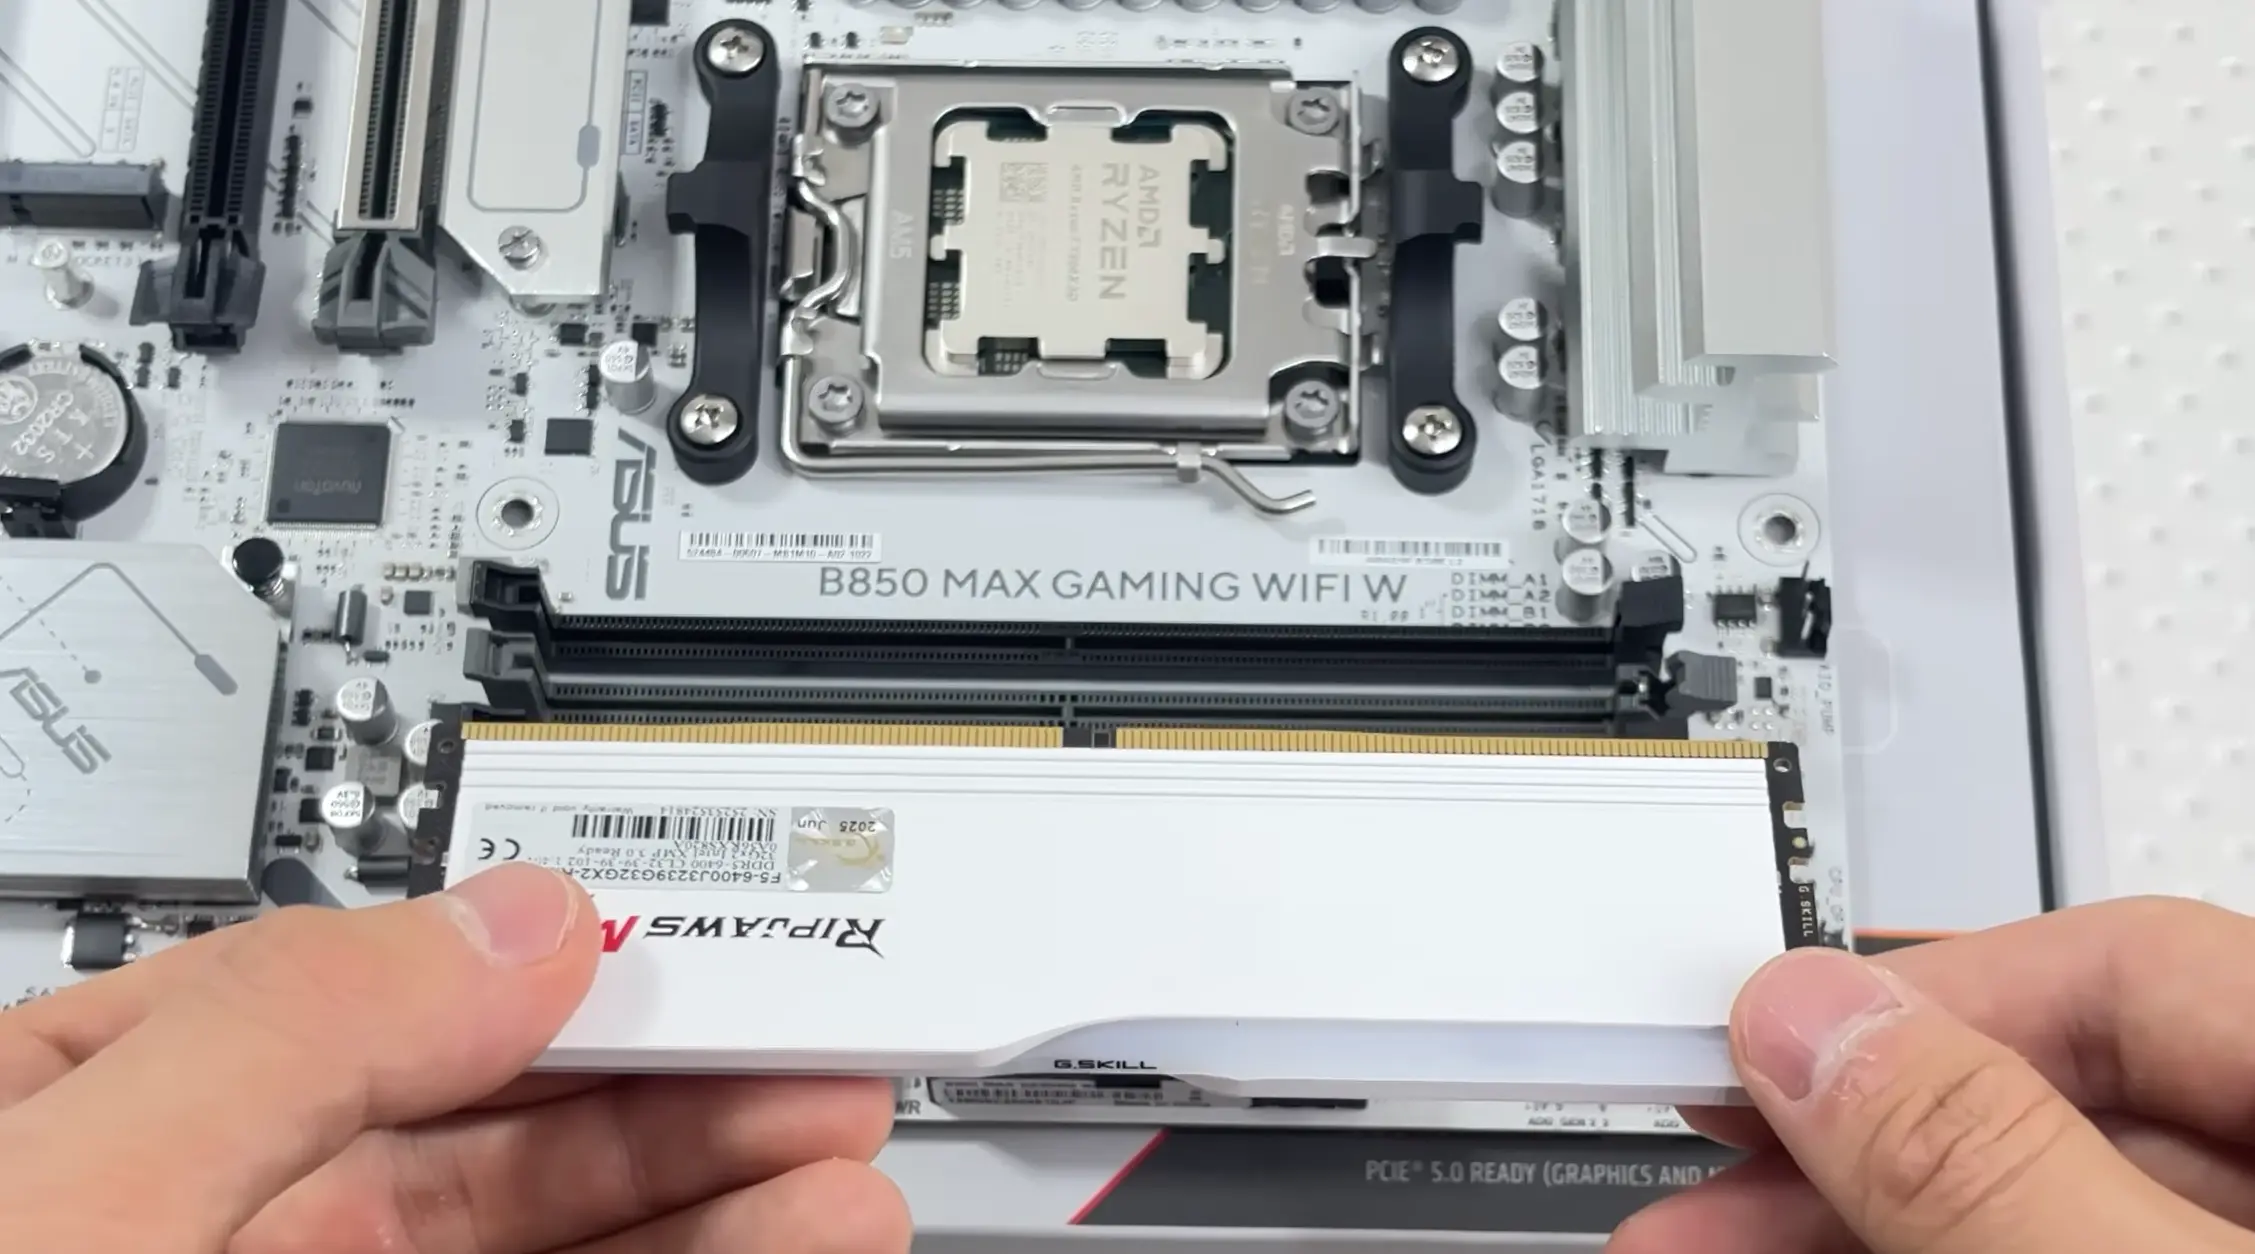
Start with the motherboard outside the case. Open the CPU socket and hold the processor by its edges. Find the small alignment triangle on the CPU and match it with the corresponding marker on the motherboard socket.
Lower the processor gently into position. Do not press down or force it. When properly aligned, it should sit in the socket without pressure. Close the retention mechanism to secure it.
Next, install the RAM. Check the motherboard manual before choosing the slots. With two memory sticks, the recommended positions are commonly the second and fourth slots from the CPU, but the board manual should take priority.
Open the required latches, align the notch on the memory stick with the slot, and press firmly until the module locks into place.
Finish with the M.2 SSD. Insert the drive into the appropriate slot at a slight angle, press it down, and secure it using the supplied screw or retention mechanism.
If the motherboard includes an M.2 heatsink, remove the protective film covering its thermal pad before reinstalling it.
Step 2: Prepare the Case and Install the Motherboard
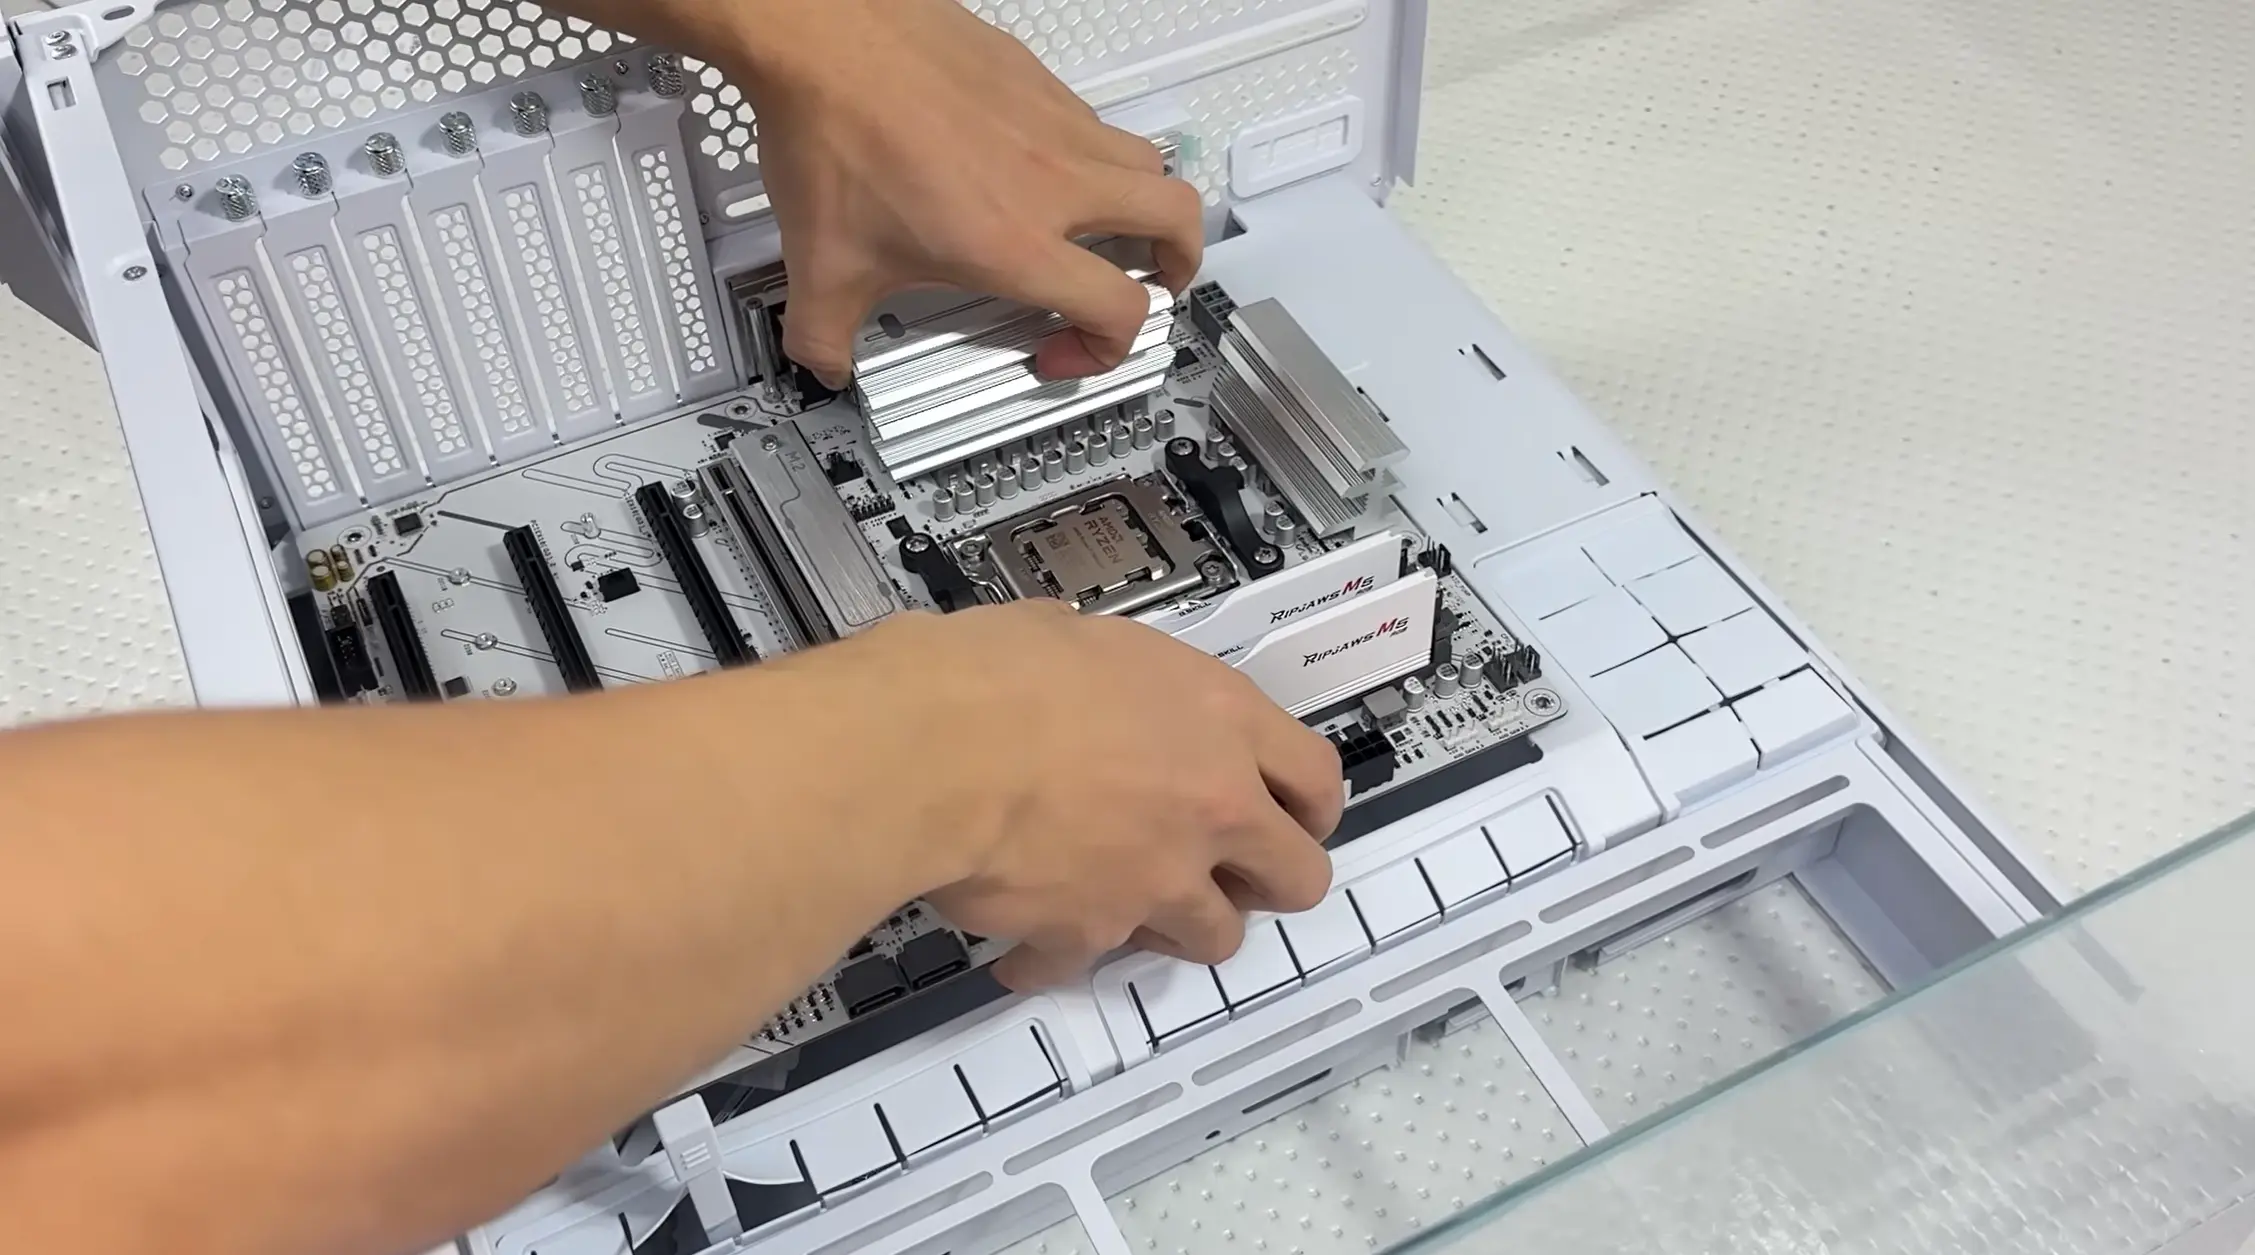
Remove both side panels from the PC case so there is enough room to work. Look at the motherboard standoffs already installed inside the case. Their positions need to match the mounting holes on your motherboard. Add any missing standoffs and remove unnecessary ones.
If the motherboard has a separate I/O shield, install it in the rear opening of the case before mounting the board. Some motherboards come with the I/O shield permanently attached.
Carefully lower the motherboard into position. Align the rear ports with the case opening and place each mounting hole directly over a standoff.
Insert the motherboard screws and tighten them until the board is secure. Excessive force is unnecessary. While access is still easy, locate the case cables for USB, USB-C, audio, power switch, reset switch, power LED, and drive activity LED.
Use the motherboard manual for the front-panel connector layout because the exact pin arrangement varies between boards.
Step 3: Install the CPU Cooler and Fans
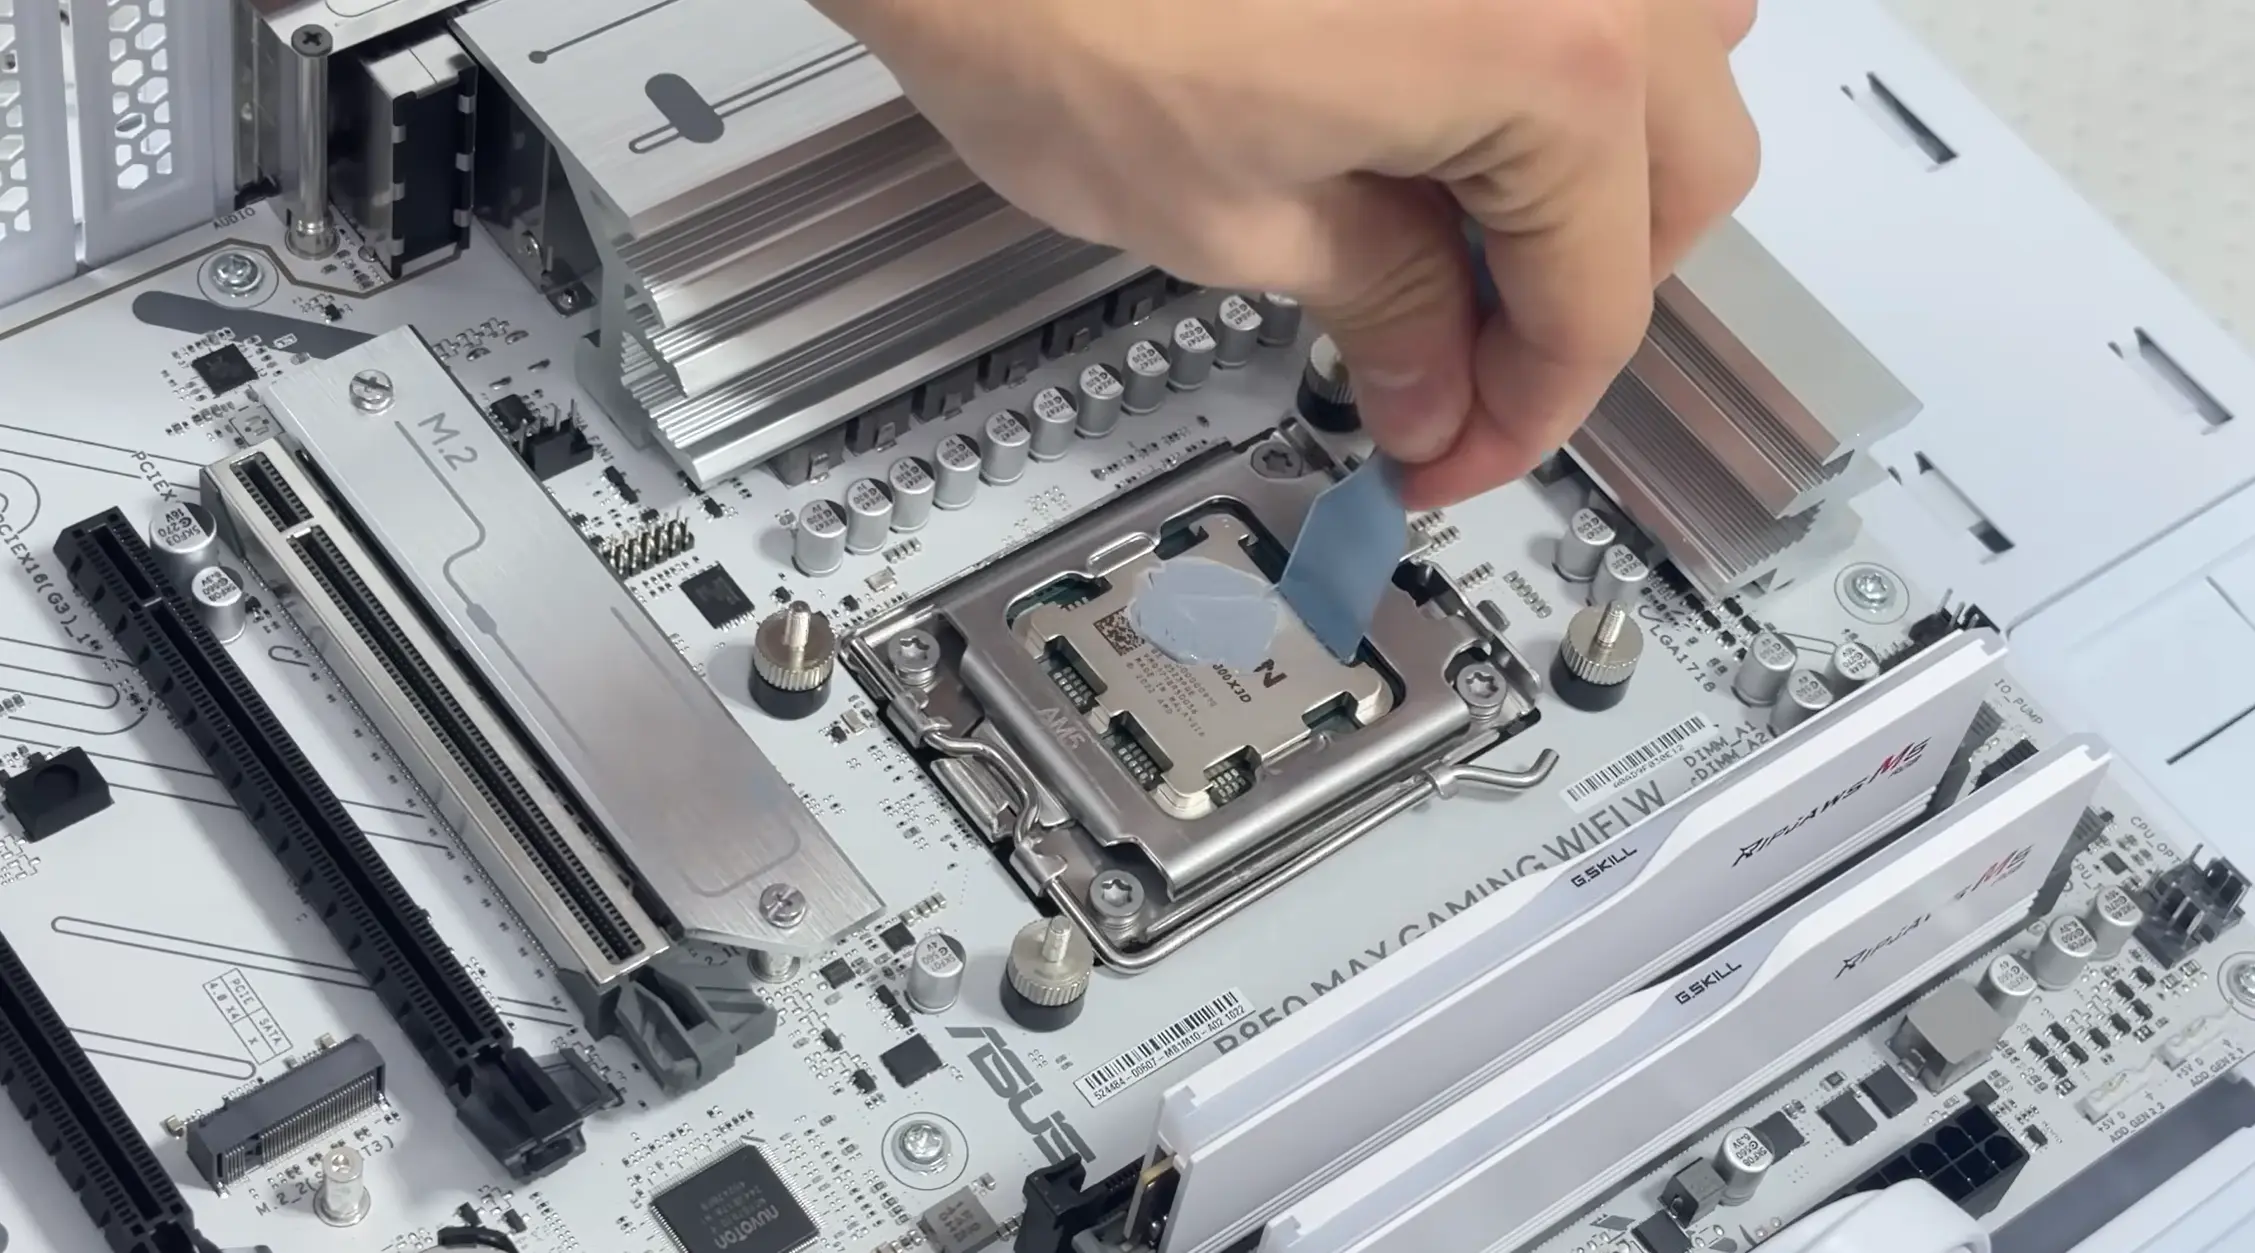
The CPU cooler can now be mounted. For an air cooler, first check whether thermal paste is already applied to its contact surface. If it is not, apply thermal paste before mounting the cooler using the hardware designed for your CPU socket.
Once secure, plug the cooler’s fan cable into the motherboard’s CPU_FAN header.
An AIO liquid cooler requires a few additional checks. Make sure the radiator fits in the selected position without interfering with the RAM, graphics card, or other hardware.
Install the required mounting hardware, remove any protective plastic from the cooler’s contact surface, and secure the pump or cold plate over the CPU.
Connect the pump and radiator fans according to the cooler and motherboard instructions. Additional case fans can then be installed.
A straightforward airflow arrangement typically uses front or side fans for intake, with rear and top fans exhausting warm air. Check the airflow direction before tightening each fan into place.
Step 4: Install the Power Supply
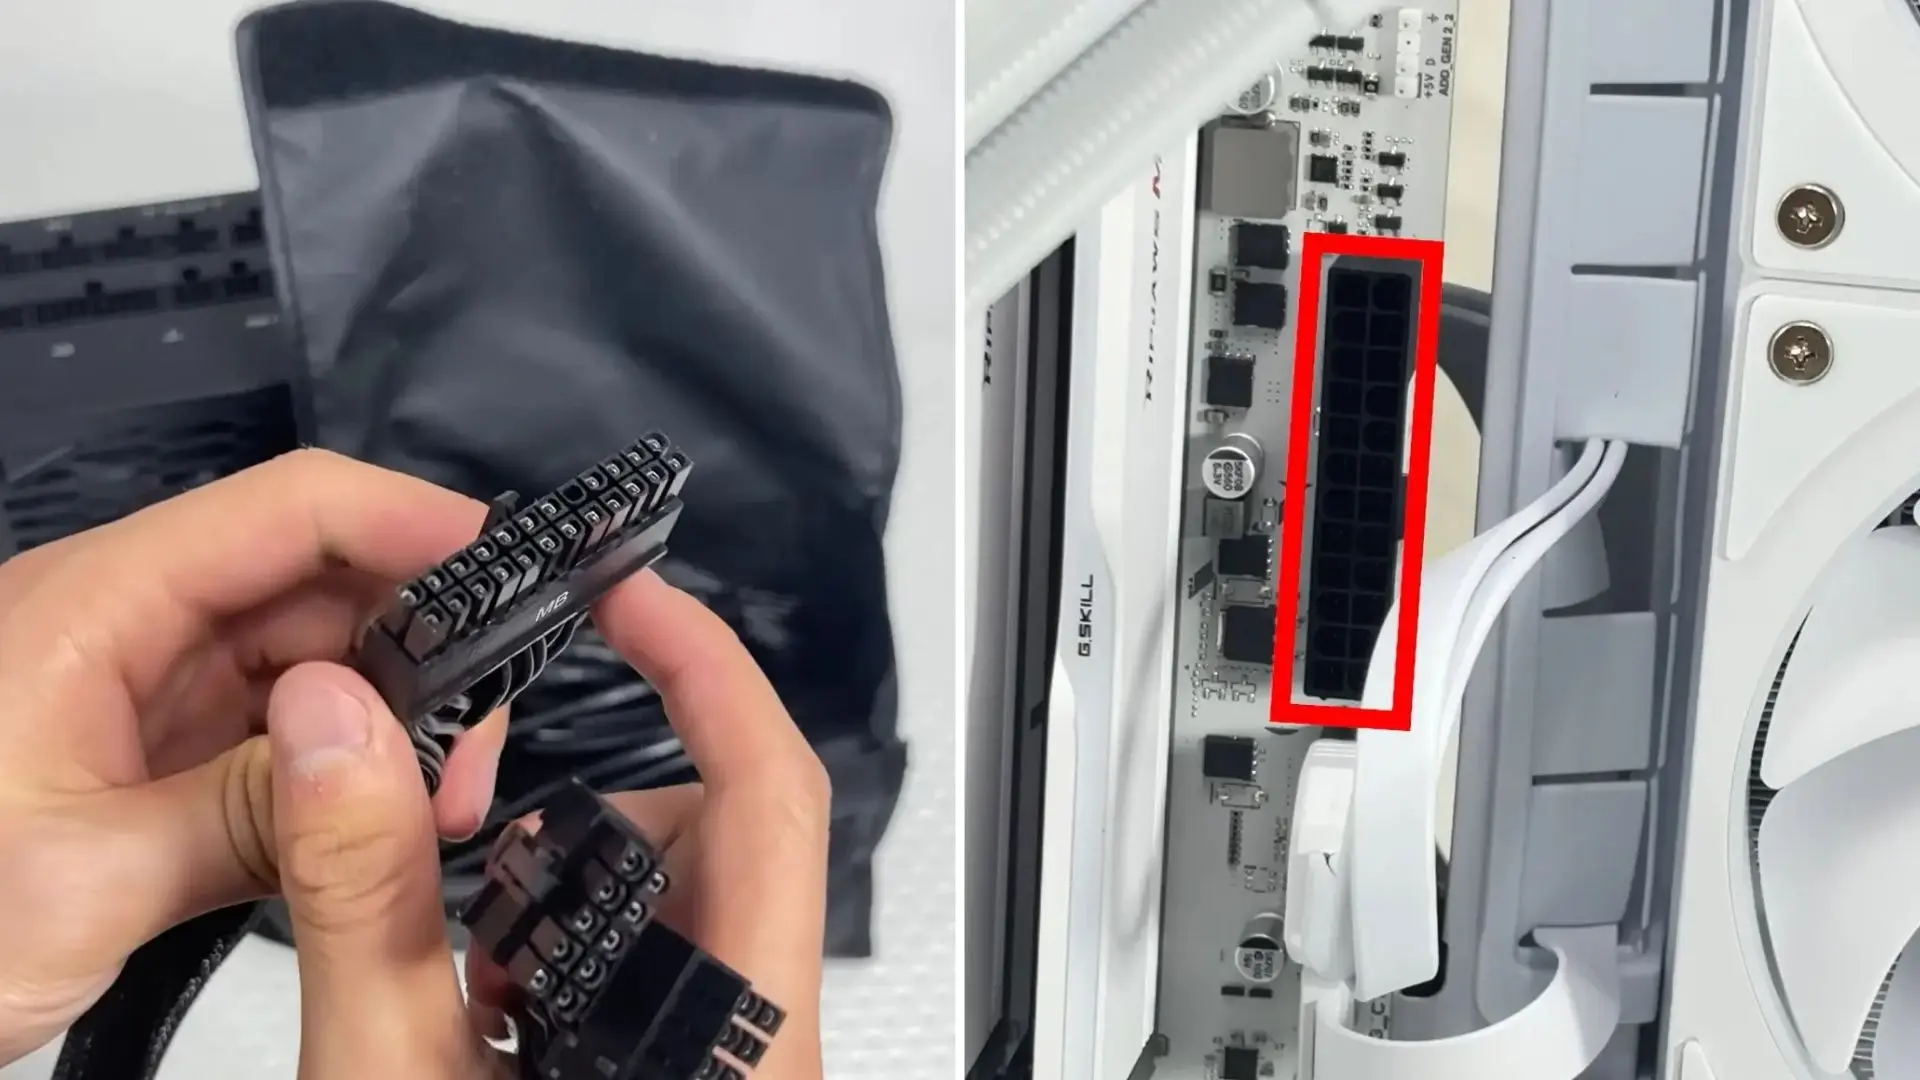
If the build uses a modular power supply, connect the required PSU cables before sliding the unit into the case. Accessing those connectors can become more difficult after installation.
Most builds use:
- 24-pin motherboard power cable
- CPU/EPS power cable
- GPU power cable
- SATA power cable when required
Do not use random modular cables simply because the connectors appear to fit. PSU cables are not universally interchangeable. Use the cables supplied with the power supply or ones the manufacturer specifically confirms are compatible.
Place the PSU in its compartment with its fan facing the case’s ventilation opening and secure it at the rear.
Route the 24-pin cable to the motherboard’s main power connector. Then connect the CPU power cable near the top of the motherboard.
SATA power can be connected to SATA drives, fan hubs, or other devices that need it. Leave the graphics-card power cable accessible for the next step.
Step 5: Install the Graphics Card
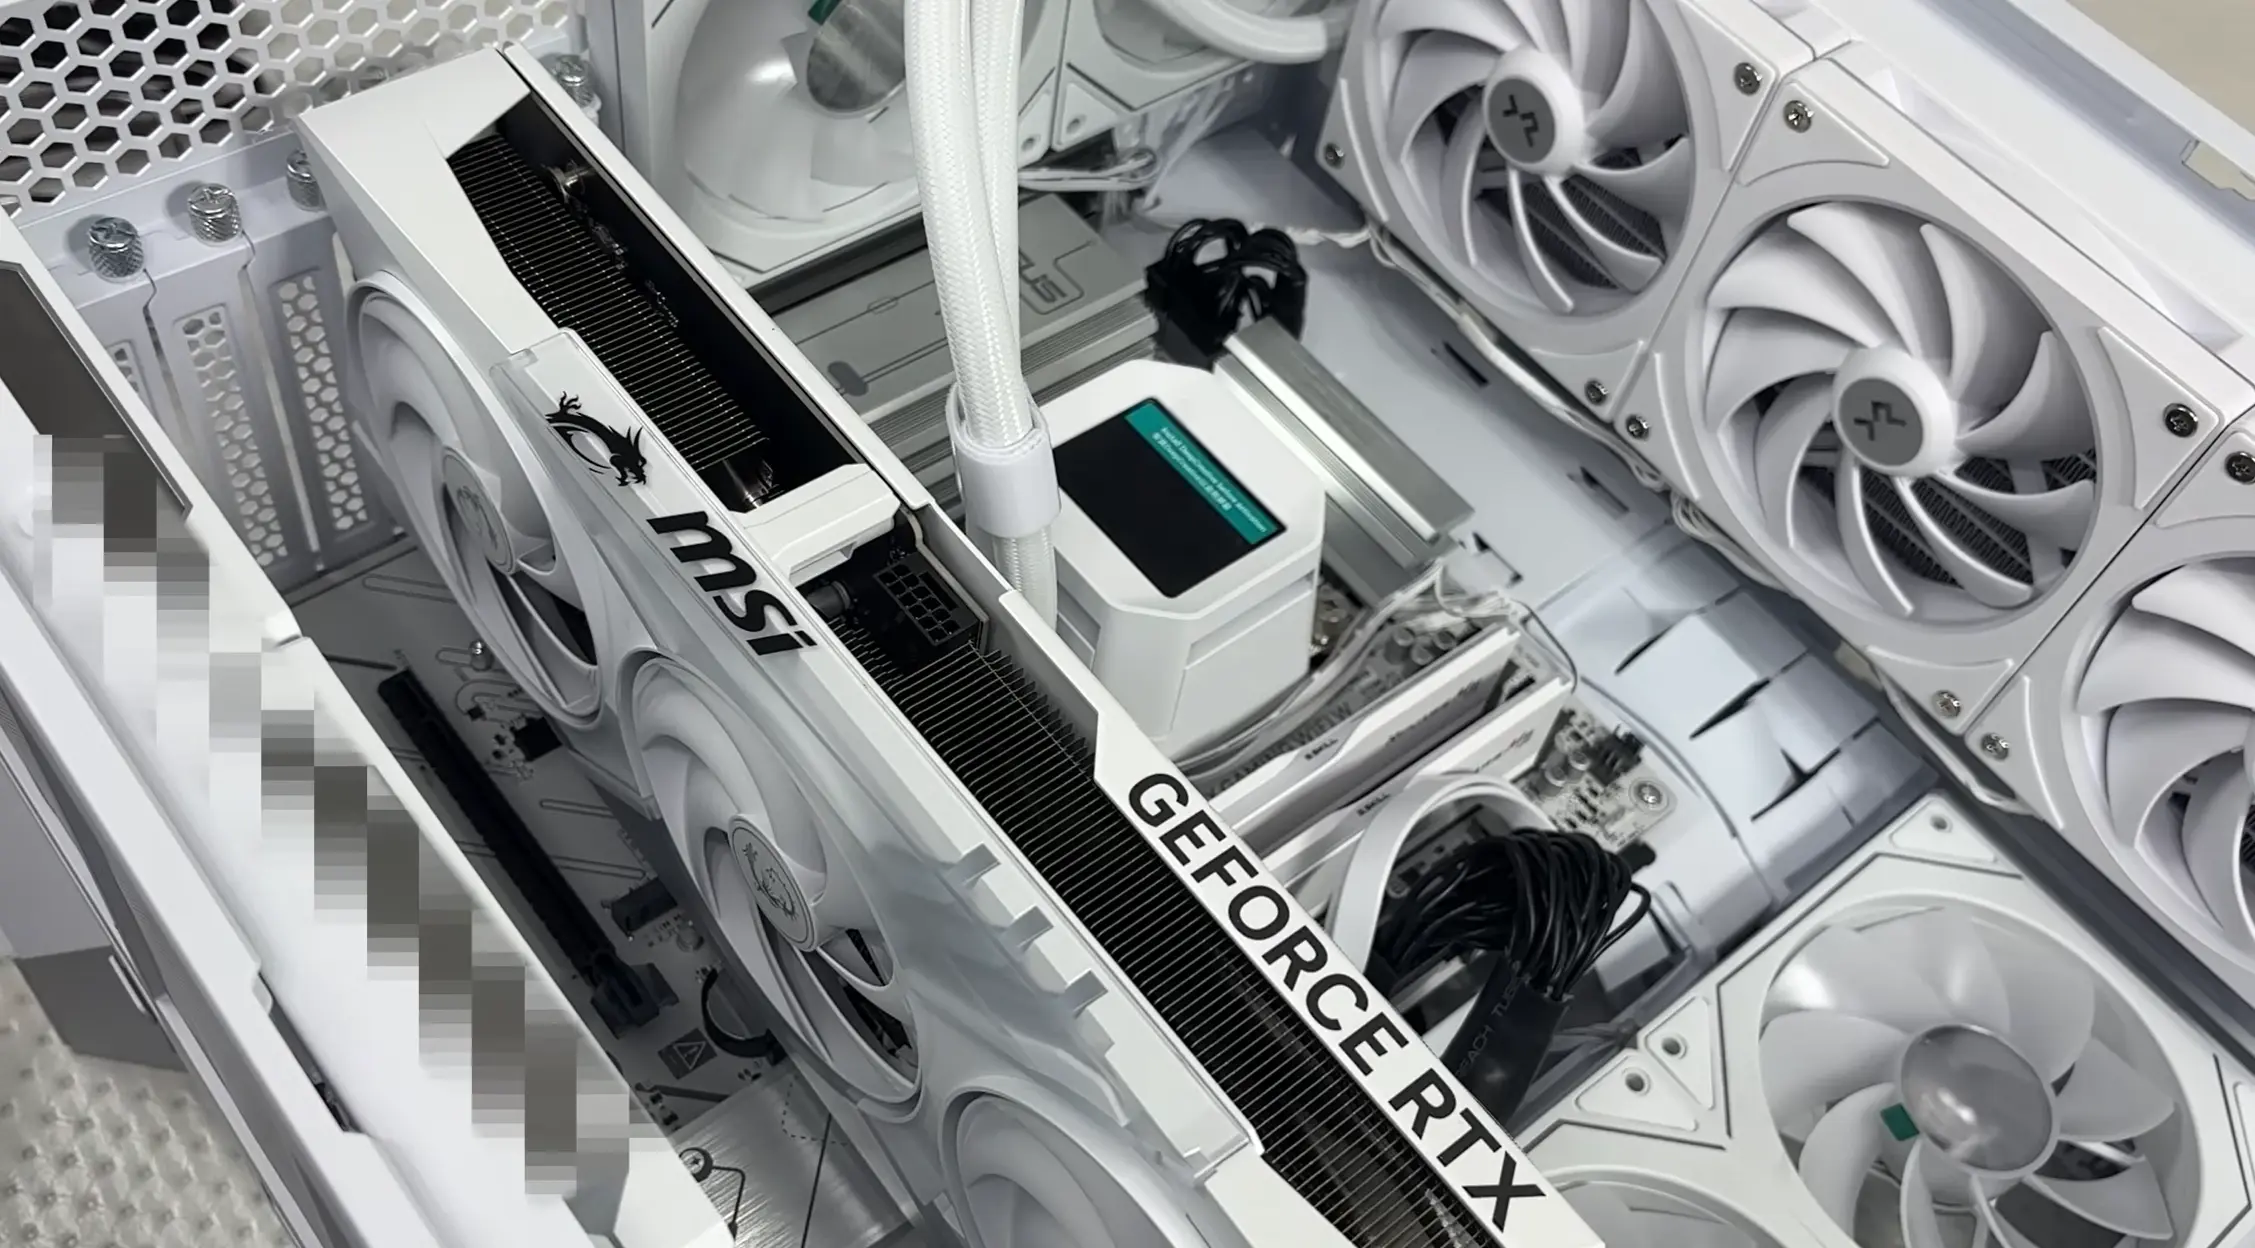
Remove the expansion-slot covers that line up with the motherboard’s main PCIe x16 slot.
Open the PCIe retention latch and position the graphics card directly above the slot. Press it straight down until it is fully seated and the retention mechanism engages.
Secure the card to the case using the appropriate screws. Large or heavy graphics cards may also benefit from a support bracket.
Connect the GPU power cable or cables required by the card and confirm every connector is completely inserted.
Before moving on, check the main connections:
- 24-pin motherboard power
- CPU power
- Graphics-card power
- CPU cooler or pump
- Case fans
- Front-panel connectors
- Front USB and audio
- Storage cables, if used
Do not permanently tighten all the zip ties yet. Keeping the cables accessible makes the first boot easier to troubleshoot if something needs to be reconnected.
Step 6: Turn On the PC and Enter BIOS
Connect the monitor, keyboard, and power cable.
When the system has a dedicated graphics card, connect the monitor to the graphics card’s display output rather than automatically using the motherboard’s video connection.
Switch on the power supply and press the case power button.
If the computer starts successfully, enter the BIOS. Delete and F2 are common setup keys, although the exact key depends on the motherboard.
Check that the BIOS recognizes:
- CPU
- Correct amount of RAM
- SSD
- CPU cooler or pump
- Connected fans
This first check helps confirm that the major components are installed and communicating correctly.
If supported, the appropriate XMP, EXPO, or equivalent memory profile can also be enabled so compatible memory operates using its rated profile settings.
Save the BIOS settings and restart the PC.
For a complete walkthrough of the process, check out the video tutorial below:
Install the Operating System and Drivers
Once the hardware is working correctly, shut the system down and finish the cable management.
Use zip ties or Velcro straps to group cables neatly, but keep them clear of fan blades and avoid sharp bends or unnecessary tension near connectors.
Close the case panels and connect the USB drive containing your operating system installer.
After the operating system is installed, complete the main software setup by installing:
- System updates
- Motherboard and chipset drivers
- Graphics card drivers
- Other hardware drivers required by the system
These updates and drivers make up the layer that quietly keeps your hardware and software talking to each other, so it’s worth keeping them current even after the initial setup. At this point, the PC is ready for normal setup, applications, games, and other software.
What to Check If the PC Does Not Start
A failed first boot does not automatically mean a component is damaged. Since you made many connections during assembly, start by checking the basics rather than immediately removing every part.
Confirm that the power supply is switched on and that the 24-pin motherboard and CPU power connectors are fully seated.
Then check the front-panel power-switch connection against the motherboard manual. If the fans start but there is no display, confirm that the RAM and graphics card are fully installed and that the monitor is connected to the correct output.
Also recheck GPU power, cooler connections, and any cables that may have loosened during installation.
Work through one connection at a time. Changing several components simultaneously makes it harder to identify what caused the problem.
Common PC Building Mistakes to Avoid
Most first-build problems come from small installation errors rather than complicated technical failures. Knowing where mistakes commonly happen can save considerable troubleshooting time.
- Buying incompatible components: Check CPU socket, memory type, motherboard size, cooler clearance, GPU dimensions, PSU requirements, and case support before ordering.
- Forcing a component: CPUs, memory, graphics cards, and connectors are designed for specific positions. If something requires excessive force, check its alignment first.
- Using incorrect motherboard standoffs: Only standoffs that line up with motherboard mounting holes should remain underneath the board.
- Leaving protective film in place: CPU coolers and M.2 heatsinks can include protective plastic over thermal surfaces that must be removed before installation.
- Using the wrong RAM slots: Follow the motherboard’s recommended configuration, especially when installing a two-stick kit.
- Overtightening screws: Components need to be secure, but overtightening can damage threads or mounting points.
- Mixing modular PSU cables: Similar-looking cables from different power supplies may use different wiring.
- Connecting the display incorrectly: Systems using a dedicated graphics card generally require the monitor to be connected to the GPU.
- Finishing cable management too early: Test the computer successfully before tightly securing every cable.
These are simple details, but catching them early can make the difference between a smooth first boot and unnecessary troubleshooting.
Final Thoughts
Building a computer becomes much easier once you stop viewing it as one complicated project and handle it as a series of small installation steps. I recommend checking compatibility first, keeping the motherboard manual nearby, and never forcing a component that does not fit easily.
Once you understand how to build a PC, you also gain better control over future repairs and hardware changes. Your first build may take several hours, and that is perfectly reasonable. Accuracy matters more than speed.
Before closing the case, check every power connection, confirm the hardware in BIOS, and complete a successful startup. With careful preparation and patience, you can turn a collection of separate components into a working PC.
Frequently Asked Questions
Can I build a PC without previous experience?
Yes. A first-time builder does not need advanced technical knowledge. Patience, careful handling, compatibility checks, and following the motherboard and component instructions are more important than previous experience.
How long does it take to build a PC for the first time?
A first PC build can take several hours. Simple systems may be completed faster, while liquid cooling, additional storage, lighting, complex cable management, or first-boot troubleshooting can extend the process.
Is building a PC cheaper than buying one?
Not always. Building gives you more control over component selection and where the budget is spent, while prebuilt PCs can sometimes be competitively priced during sales. A custom system can also make future component upgrades more straightforward.
Do I need to buy thermal paste separately?
Only if the CPU cooler does not already include or have thermal paste pre-applied. Check the cooler before buying an additional tube.
Should I install the motherboard before the CPU?
For most builds, installing the CPU, RAM, and M.2 SSD while the motherboard is outside the case makes these components easier to access. The prepared motherboard can then be mounted inside the case.