


Most teams don’t outgrow their tools; they outgrow how they’re using them. Trello project management works the same way.
The tool itself is simple. What separates teams that get real value from it and teams that abandon it after a month is almost always setup, not features.
The way Trello structures work, boards, lists, cards, automation, makes sense once you see how the pieces connect. But that connection isn’t obvious from the outside, and most people never slow down long enough to build it right.
Here you’ll find a clear breakdown of how Trello works, what it’s genuinely built to handle, and where it hits its limits. If you’re deciding whether it fits your workflow, this is the right place to start.
What Is Trello and How Does It Work?
Trello is a Kanban-style project management tool that organizes work through boards, lists, and cards. Each layer has a job: boards hold your project, lists mark where work stands, and cards carry the individual tasks.
That structure is the whole system. When someone drags a card from “In Progress” to “Done,” they’re not just tidying up a screen. They’re updating the team on task status in real time- no status meeting, no email chain required.
What makes Trello different from most project tools is what it doesn’t do. It doesn’t hand you a template and tell you how to work. You build the lists, name the stages, and decide what progress looks like for your team.
That flexibility is genuinely useful. It’s also where most people struggle at first, because a blank board with no structure is just a blank board.
Core Features That Drive Project Management in Trello
Trello’s features aren’t a checklist; they’re a set of tools that work together. Understanding what each one does makes the difference between a board that runs smoothly and one that quietly falls apart.
Boards, Lists, and Cards
A board is your project. Lists are the stages that the project moves through. Cards are the individual tasks sitting inside those stages.
The relationship matters more than the parts. A card without a well-defined list is just a sticky note. A list without clear stage definitions creates confusion about what “done” actually means.
When all three are set up deliberately, you can see exactly where work is, who owns it, and what’s stalled at a glance.
What You Can Do Inside a Card
Cards are where the actual work lives. Each one can hold assignments, due dates, checklists, labels, file attachments, and comments.
The checklist feature is worth paying particular attention to. You can break a single task into smaller steps, assign those steps to different people, and track completion without creating separate cards for each sub-task.
For anything with multiple moving parts, that alone saves a lot of back-and-forth.
You can also mirror a card across multiple boards, which is useful when a task spans multiple projects. That requires a Standard plan, but the setup is straightforward once you’re there.
Butler Automation
Butler is Trello’s built-in automation tool, and it’s more capable than most people realize when they first see it.
It works on a condition-trigger-action structure. You define a condition (“when a card’s due date passes”), a trigger (“and the checklist isn’t fully complete”), and an action (“move the card to Blocked and notify the assigned member”).
That entire sequence runs automatically, without anyone having to remember to do it.
The practical result is that your board stays accurate even when people are deep in the work and not actively updating it. Cards move, notifications fire, and nothing falls through the cracks because someone forgot to drag a card across the screen.
On the Free plan, Butler handles basic rules. Standard and above unlock more complex multi-step automations.
Power-Ups and Integrations
Power-Ups connect Trello to external tools, Slack, Google Drive, Microsoft Teams, Outlook, and others. Each one adds functionality that Trello doesn’t build natively.
One thing to know before you set them up: Power-Ups are configured per board, not across your whole workspace.
If you connect Google Drive to one board, that connection doesn’t carry over automatically to the next one. Plan for that during setup, especially if you’re running several boards at once.
How to Use Trello for Project Management
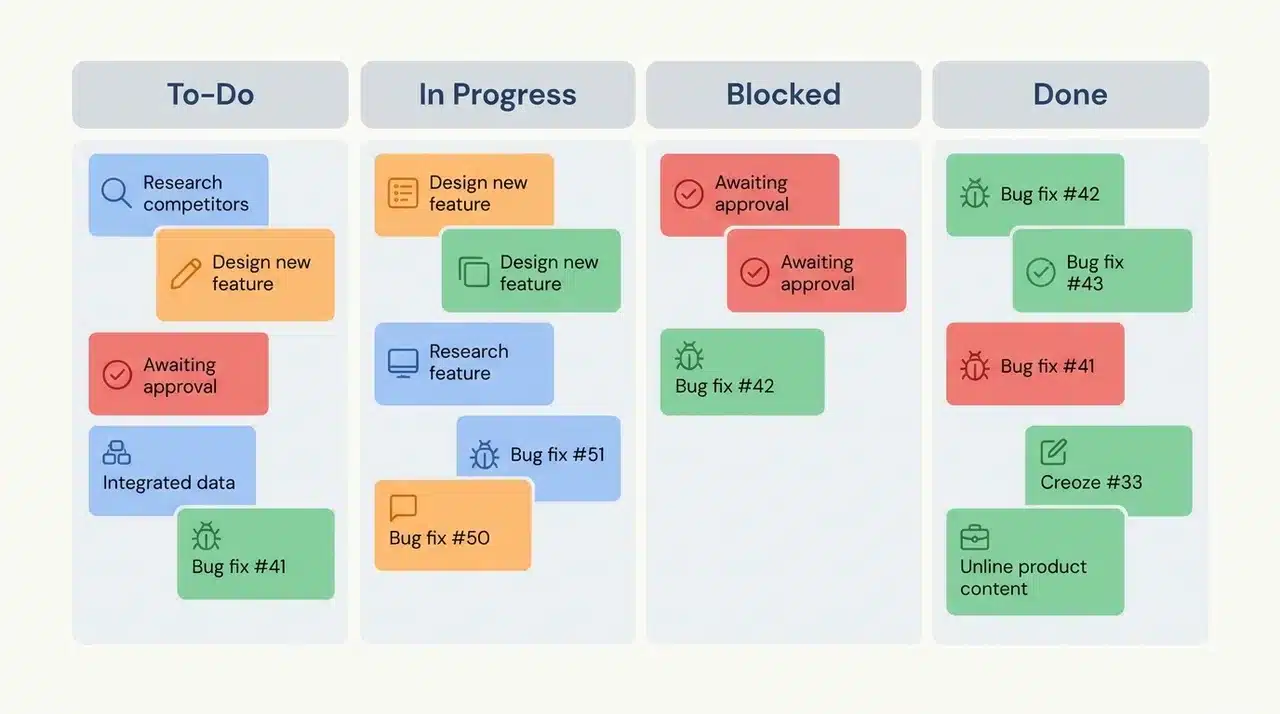
Knowing what Trello’s features do is one thing. Knowing how to put them together into a working project is what actually matters.
1. Set Up Your Board the Right Way
Start with one board per project. That boundary matters; mixing two projects onto one board is one of the fastest ways to create confusion about what belongs where.
Once the board exists, build your lists before you add a single card. Your lists are your workflow stages, and they need to reflect how work actually moves in your team, not how you wish it moved.
Generic defaults like “To-Do,” “In Progress,” and “Done” work for simple projects. Anything more complex usually needs more specific stages: “Waiting on Review,” “Blocked,” “Ready to Publish,” and so on.
Get the list structure right first. Everything else depends on it.
2. Add Cards as Tasks Get Defined
Cards go in as tasks are scoped, not all at once upfront. Dumping every possible task onto a board before the project starts sounds organized. In practice, it creates a backlog that nobody trusts.
Add a card when the task is real, when someone owns it, when it has a due date, or when it’s genuinely next in line. Fill in the card details at that point: assignee, checklist, labels, any relevant attachments.
A lean board with accurate cards beats a full board with stale ones every time.
3. Limit Work in Progress
This is where most Trello boards quietly break down. The Kanban method that Trello is built on assumes you’ll cap the number of cards in any one list at a time, especially “In Progress.”
When that limit disappears, “In Progress” becomes a dumping ground. Ten cards sit there for two weeks. Nobody knows what’s actually moving. The board stops reflecting reality and starts reflecting wishful thinking.
Set a cap. Even an informal one. If more than four or five cards are in progress at once, something is either blocked or the work isn’t scoped tightly enough.
4. Use Premium Views When You Need a Different Angle
Timeline, Calendar, and Dashboard views aren’t separate tools. They’re different ways of looking at the same board data you’ve already set up.
The timeline shows task dependencies and durations, useful when you need to see how work overlaps over time.
Calendar pulls due dates into a monthly view, which helps teams spot deadline clusters before they become a problem. Dashboard surfaces completion rates and workload distribution across the board.
None of these views require rebuilding anything. The work you put into your cards and lists populates them automatically. That’s worth knowing before you skip a Premium plan, assuming these views mean extra setup.
What Trello Does Not Handle Well
Trello works well for the right kind of work. But there are real gaps worth knowing before you build your whole workflow around it.
No native time tracking. There’s no built-in way to log hours against a task or pull time reports across a board. You’ll need a Power-Up to fill that gap, which means a third-party integration, per-board configuration, and sometimes an added cost on top of your plan.
No Gantt charts. If your project has tasks that depend on each other, Timeline view offers a rough approximation. But it won’t flag dependency conflicts automatically or manage sequencing the way a dedicated Gantt tool would.
Limited reporting. Dashboard view surfaces basic completion metrics, but there’s no native way to generate a project status report or track progress over time. What you see on the board is largely what you get; nothing more gets exported or summarised automatically.
Scale creates noise. Kanban works beautifully when cards are few and stages are clear. As projects grow larger and teams get bigger, boards get cluttered fast. The visual clarity that makes Trello useful early on starts working against you at scale.
These aren’t dealbreakers; they’re boundaries. Know them going in, and you’ll know exactly where Trello fits and where it doesn’t.
Trello Plans and What Each Unlocks
Trello’s pricing isn’t just about how much you pay; it’s about which capabilities open up at each tier. The right plan depends on what your workflow actually needs.
Here’s what each plan covers and who it’s built for:
- Free: Unlimited cards, basic Butler automation, up to 10 boards per workspace. Right for individuals or small teams running contained, straightforward projects.
- Standard ($5/user/month, billed annually) adds card mirroring, advanced checklists, and more automation capacity. The threshold plan for teams managing work across multiple boards.
- Premium ($10/user/month, billed annually) adds Timeline, Calendar, and Dashboard views, plus AI features and admin controls. Worth it when stakeholders need visibility or teams are juggling multiple projects.
- Enterprise: Organization-wide permissions and security controls. Built for larger organizations that need centralized governance across multiple workspaces.
The meaningful upgrade triggers aren’t user count; they’re capability unlocks. Start on the lowest plan that covers your actual needs, and move up when a specific gap becomes real.
Wrapping Up
Trello is one of those tools that rewards clarity. The teams that get the most from Trello project management aren’t necessarily the most organized; they’re the ones who set it up to match how they actually work, not how they think they should work.
It handles visual task tracking, team collaboration, and straightforward workflows better than most tools at its price point.
The gaps are real: no native time tracking, no Gantt charts, limited reporting, but they’re predictable. Know them going in, and you can plan around them.
If Trello fits your workflow, start simple. One board, clean lists, real tasks. Let the structure prove itself before you add complexity. Get started with Trello’s free plan and see how far a well-built board can take your team.
Frequently Asked Questions
Is Trello free to use?
Yes. The Free plan includes unlimited cards, basic Butler automation, and up to 10 boards per workspace. Paid plans start at $5 per user per month and unlock advanced views, more automation, and cross-board features.
What is Butler in Trello?
Butler is Trello’s built-in automation tool. It operates on a condition-trigger-action structure: when a condition is met, Butler automatically triggers a predefined action. It handles things like moving cards, sending notifications, and updating due dates without any coding.
Can Trello manage large or complex projects?
It can, up to a point. Trello handles linear workflows well but lacks native Gantt charts, time tracking, and reporting. Teams with complex dependencies often need Power-Ups or a separate tool to fill those gaps.
What is the difference between a Trello board and a workspace?
A workspace holds all your boards. Each board represents one project or workflow. Free workspaces are capped at 10 boards; paid plans remove that limit. Think of the workspace as your team’s home and each board as a project running inside it.