

Kodi on Firestick can seem tricky at first, but it’s not as complicated as many people think. Many assume Amazon blocked it or that installing it is risky, yet Kodi is completely legal and works on all standard Firestick models.
Getting it up and running just takes a few careful steps: setting up your device, downloading the right files, and confirming everything is installed correctly. Once you’ve done that, you’ll have a clean, ready-to-use media player waiting for your next move.
Now that I know Kodi is safe and ready for my Firestick, I’ll walk you through it step by step so we can set it up without any hassle.
What is Kodi, and Why It Isn’t it in the Amazon Appstore?
Kodi is an open-source media player that lets you organize and play videos, music, and more. It isn’t in the Amazon Appstore because while Kodi itself is legal, some add-ons can access unlicensed content, and Amazon avoids hosting apps that could create liability.
As of May 2026, Amazon has not blocked Kodi or restricted sideloading, and the process below uses only the official Kodi download. Kodi for Firestick is free.
Before You Start: Enabling Sideloading on Your Firestick
Before you download Kodi on Firestick, you need to allow sideloading on it. This doesn’t unlock your entire device; you are granting permission to a single app.
Each app that installs content from outside the Amazon Appstore must be toggled individually. For example, turning it on for Downloader won’t automatically allow other apps to use it.
If you’re on a shared or corporate account, Developer Options may be restricted; use a personal Amazon account to proceed.
If Developer Options are already visible
Go to Settings → My Fire TV → Developer Options → Install Unknown Apps.
Find Downloader and toggle it ON.
This grants the app permission to install Kodi safely.
If Developer Options are Hidden
Go to Settings → My Fire TV → About → Fire TV Stick.
Press the center button on your remote 7 times to unlock Developer Options.
Then follow the steps above to enable Install Unknown Apps for Downloader.
How to Download and Install Kodi on Firestick?
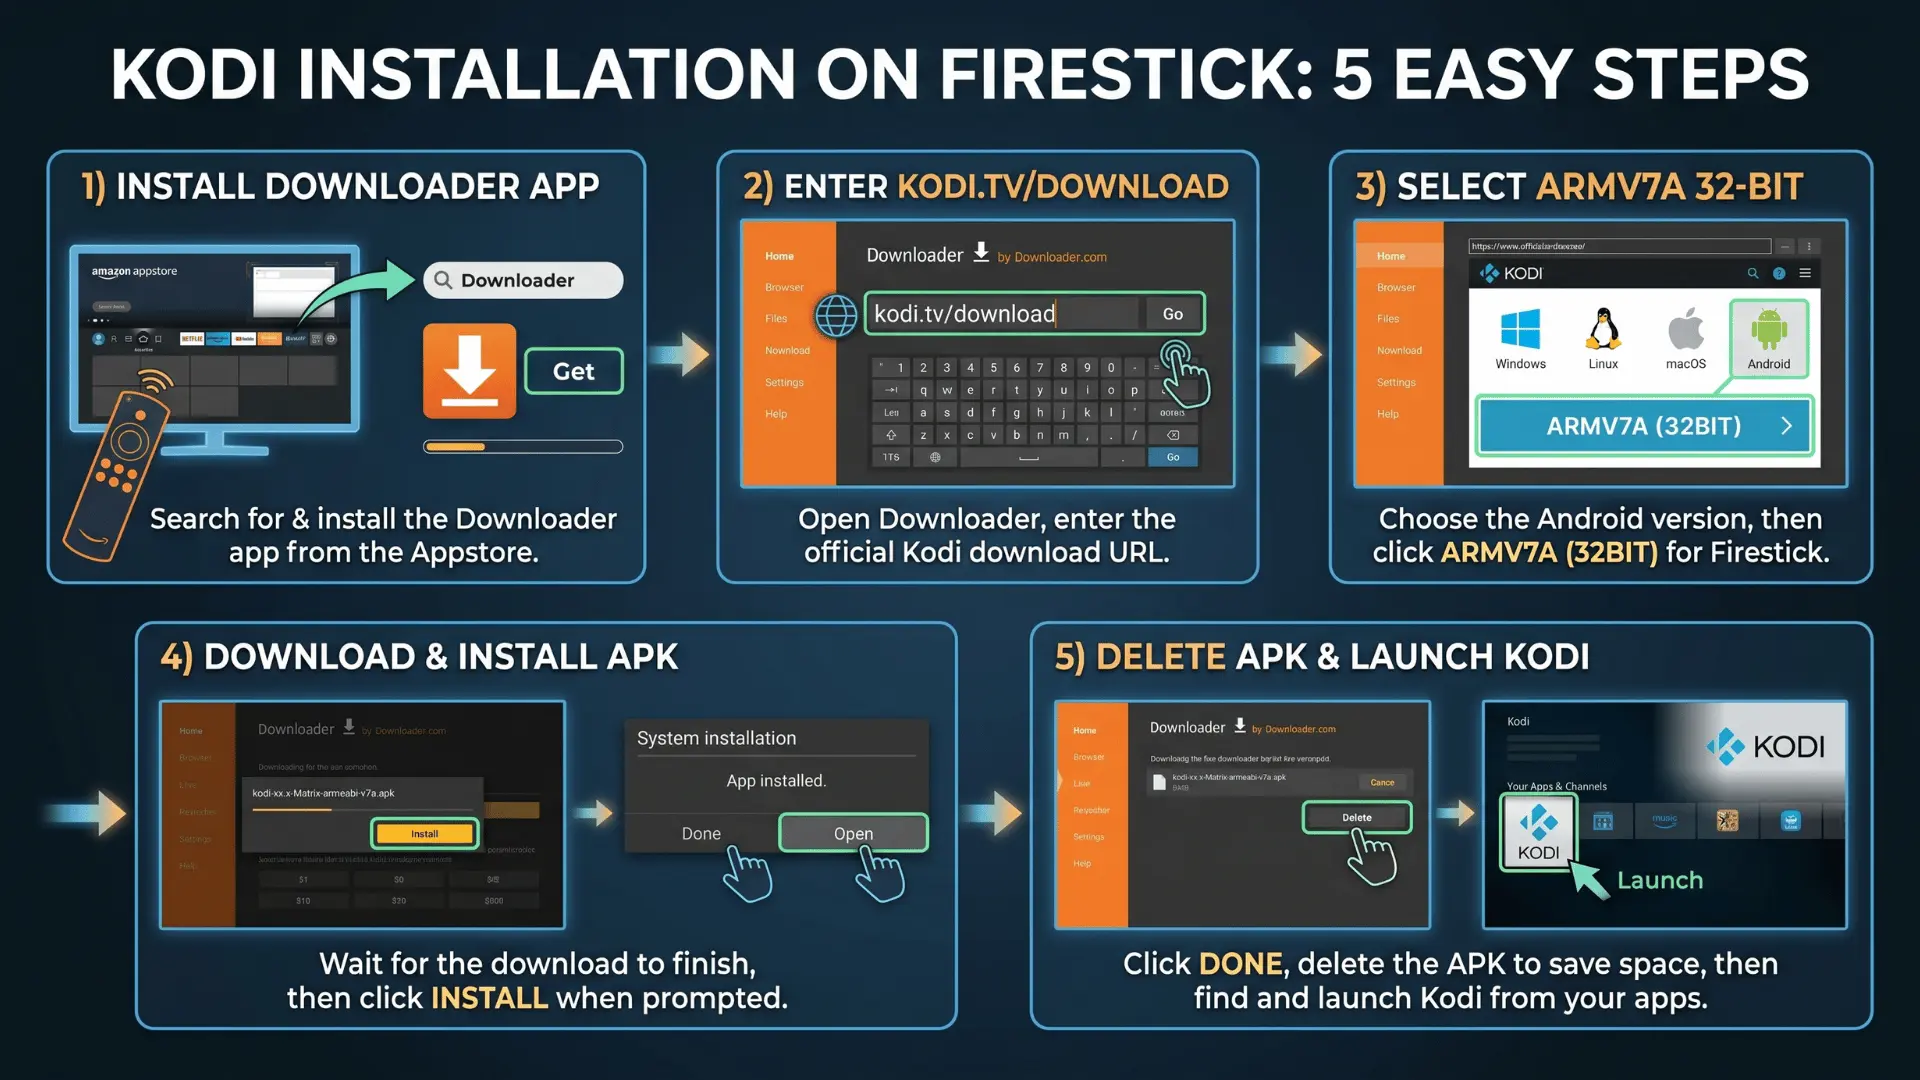
Follow these steps to get Kodi on your Firestick, starting with installing the Downloader app, then downloading the correct Kodi version, and finally running the installer for a successful setup.
Step 1: Install the Downloader App
- Search for Downloader in the Amazon Appstore and install the app with the orange icon.
- Open it and accept storage permission on first launch to allow downloads.
Step 2: Access the Kodi Download Page
- In Downloader, enter
kodi.tv/downloadthe URL in the URL field. - Scroll to the Android section to view download options.
Step 3: Select the Correct Kodi Version
- Choose ARMV7A 32-bit for most Firesticks.
- This is crucial because most Firesticks are 32-bit, and selecting the wrong version causes a silent “App not installed” error.
- The current stable release is Kodi 21.3 Omega, and the AFTV short code 35625 can be used as an alternative URL.
Step 4: Download and Install Kodi
- Navigate to ARMV7A 32-bit and wait for the APK to download fully.
- When prompted, click Install, then Done after installation completes.
Step 5: Clean Up and Launch Kodi
- Delete the APK file to free storage.
- Open Apps & Channels to locate and launch Kodi.
- Troubleshoot issues such as the wrong architecture or storage permissions if the installation fails.
Following these steps ensures Kodi is installed correctly on your Firestick, ready for safe and smooth media playback.
What to Do If the Installation Fails?
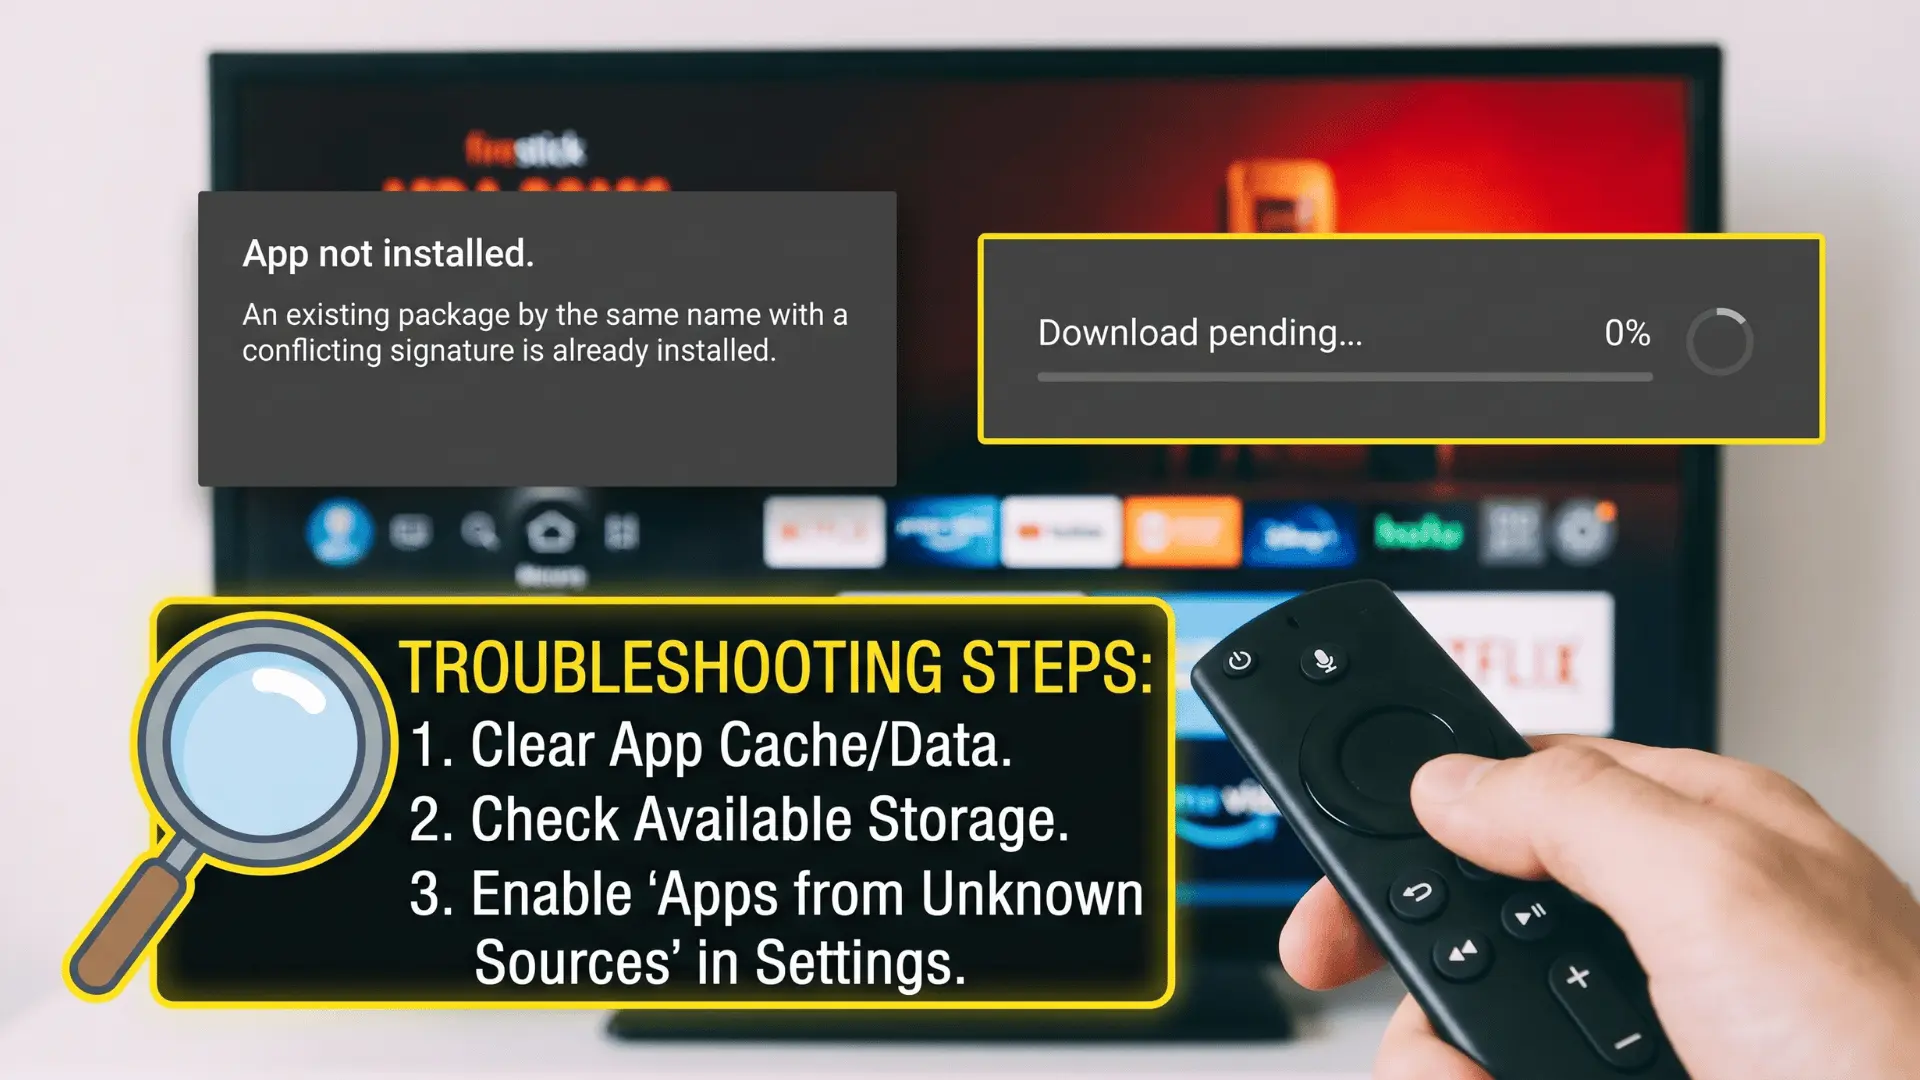
Here are the key problems you might encounter while installing Kodi and the steps to fix them smoothly:
| Issue | Cause | Fix |
|---|---|---|
| App not installed | APK architecture doesn’t match your Firestick; most devices require ARMV7A 32-bit | Re-download the correct 32-bit version and run the installer again |
| Download stuck at 0% in Downloader | Storage permission was denied on first launch | Go to the Downloader’s app settings, enable storage permission, then restart the download |
| Developer Options missing | Managed or corporate account restriction | Use a personal Amazon account to access and enable Developer Options as described in H2-2 |
These cover the most common installation failures and keep your Kodi setup on track.
After Install: First Steps Inside Kodi
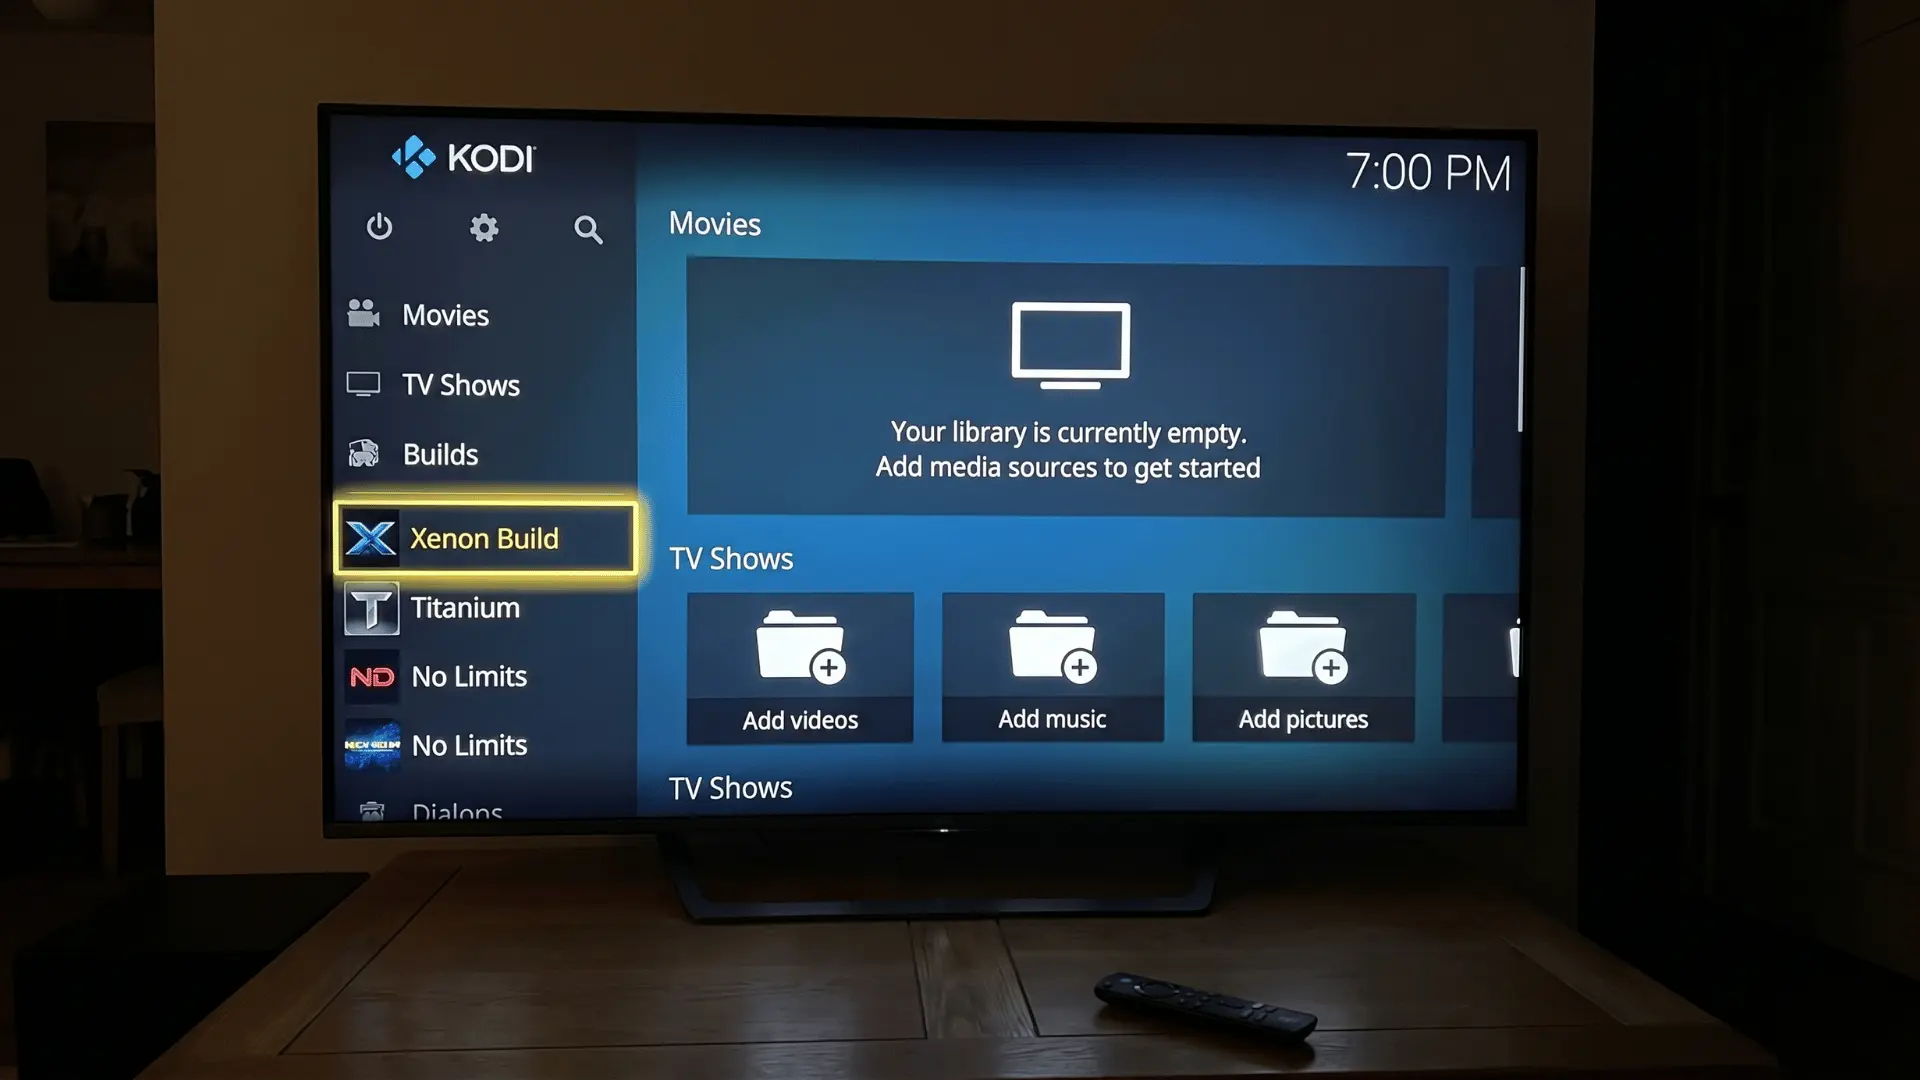
Once Kodi is installed, you can find it in Apps & Channels on your Firestick. Opening it shows an empty home screen, which is normal since Kodi doesn’t include content by default. From here, you have a few options to get started:
- Add your own media sources: Connect your personal videos, music, or other files.
- Install a preconfigured build: Builds like Xenon come ready with add-ons and interface skins for convenience.
- Use guidance resources: Sites like TROYPOINT or APKTime provide tutorials and the latest builds or add-ons.
Kodi builds simplify setup by pre-loading add-ons and skins, but always check dedicated guides for the most current and compatible options.
Wrapping Up
With Kodi on your Firestick, you now have a powerful media player set up for your videos, music, and other content. You can add your own files, try a pre-configured build, or install add-ons when you’re ready.
Make sure you pick the correct APK version and keep permissions enabled to prevent any problems.
There’s a lot more you can do with Kodi and Firestick, so check out our other blogs for extra tips, guides, and helpful advice.
Frequently Asked Questions
Which version of Kodi should I install on Firestick?
Use the current stable release from kodi.tv/download and select ARMV7A 32-bit for most Firesticks. The 64-bit version may fail silently.
Is Kodi free to install on Firestick?
Yes. Kodi and the Downloader app are free. Some third-party add-ons may incur a fee, but the base app is free.
What’s the best Kodi build for Firestick?
Builds pre-load add-ons and skins; Xenon is popular in 2026. Check a dedicated guide for the latest recommendations.
Do I need a VPN to use Kodi on Firestick?
Kodi itself doesn’t require a VPN. Use one only if streaming unlicensed content for privacy; local media or official add-ons don’t need it.