
You restart your router, close every app, and your ping barely moves. That’s not bad luck. It usually means you’re fixing the wrong half of the problem.
Ping has two parts: one set by physical distance, one caused by your own setup. Knowing how to reduce ping starts with telling these apart, because chasing the wrong one wastes time and changes nothing.
Once that’s clear, the fixes actually make sense. Some changes matter far more than others, and the order you make them in changes how much your ping actually drops.
Get that order wrong, and you’ll waste effort on fixes that barely move the needle. Start with what’s actually driving your number up.
What’s Actually Causing Your High Ping?
Your ping has two parts. One is fixed by distance, and one is caused by you. This article only fixes the second part. No setting or tool can beat the first.
The distance part comes from how far your data travels. Every hop between your PC and the game server adds a few milliseconds. Physical distance sets a floor that nothing on your end can lower.
That’s why two players with identical routers and internet plans can still see different ping numbers. One might just be sitting closer to the server. Setup alone doesn’t decide your baseline.
The part you can control sits on top of that floor. Wi-Fi interference, background downloads, and outdated drivers all add extra delay. Fix those, and your ping settles at whatever your distance allows.
Jitter and packet loss aren’t the same problem as ping. Jitter means your number keeps changing. Packet loss means data goes missing entirely. Neither responds to the fixes below.
How to Reduce Ping: Step-by-Step
These fixes are ordered by impact, not by how easy they are. Start at the top. Work down until your ping improves.
Step 1: Create a System Restore Point
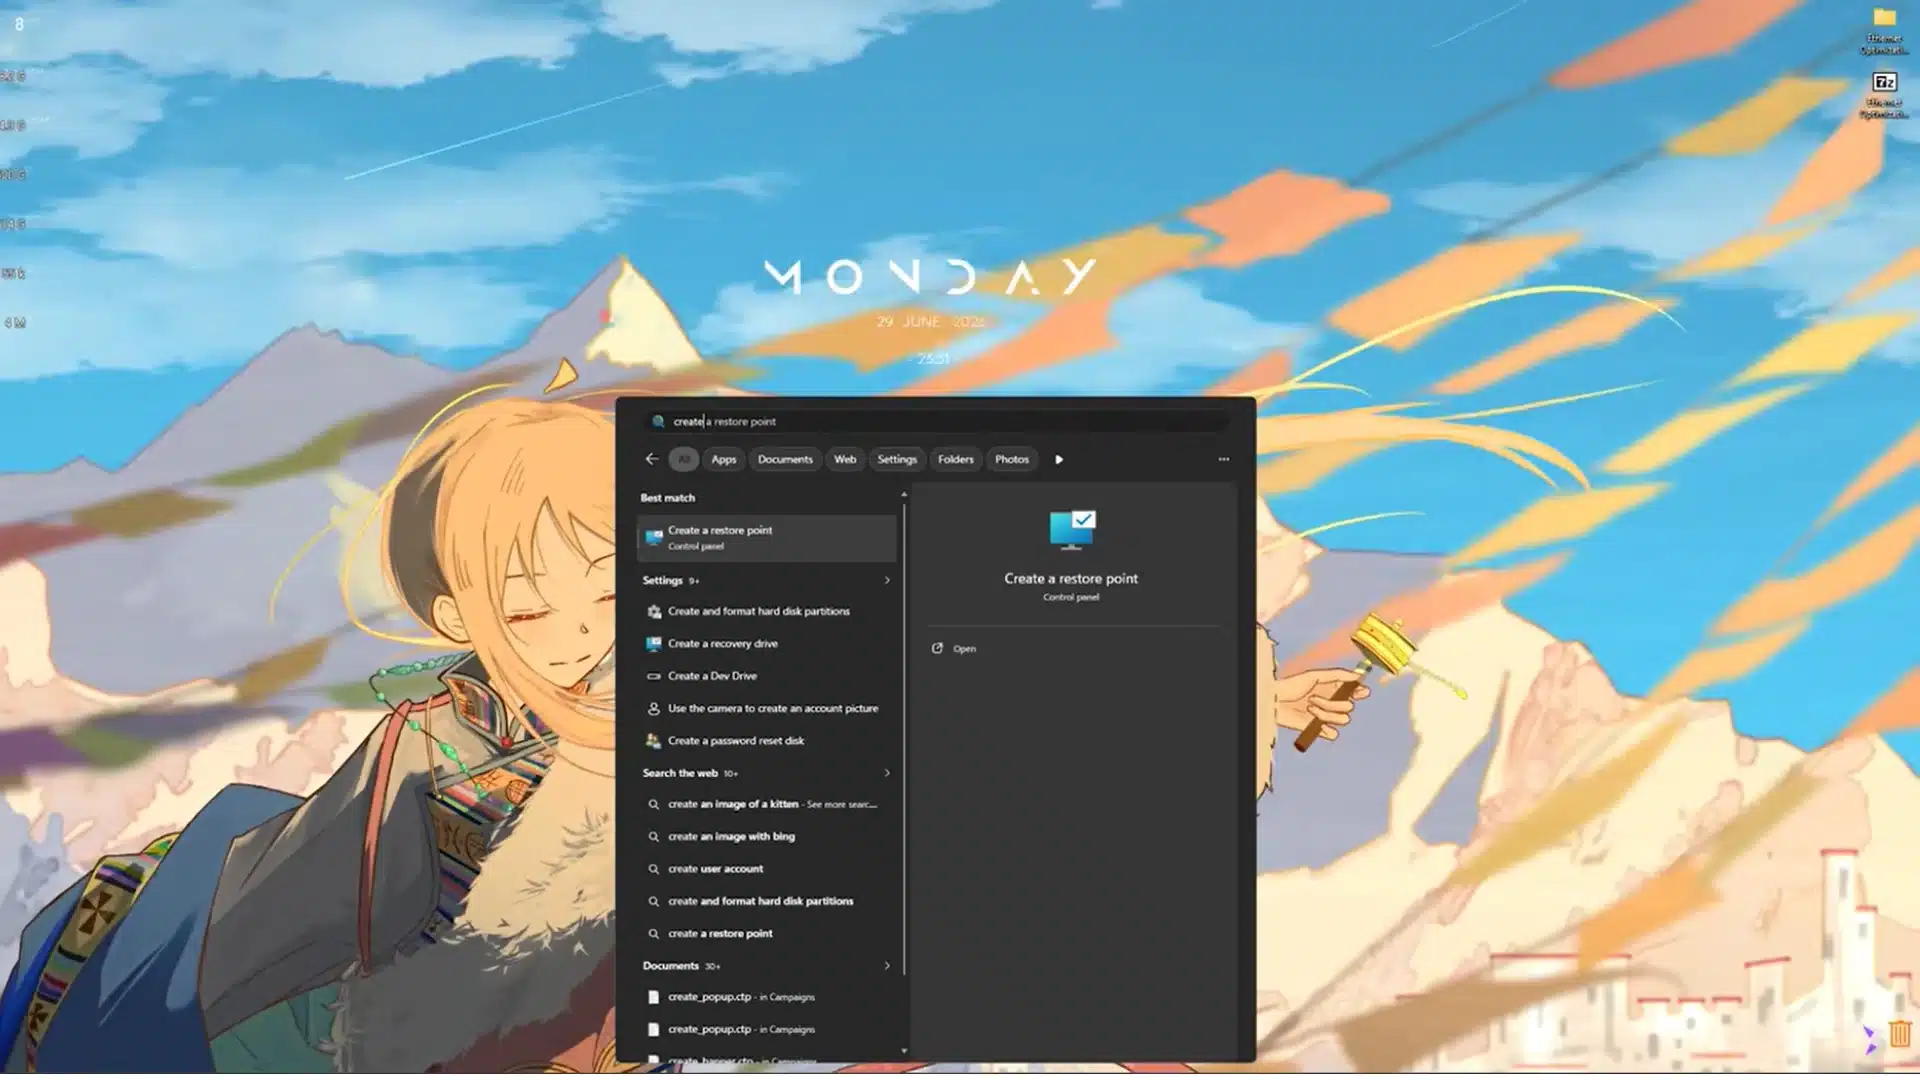
Before changing anything, search for “Create a restore point” from the Windows Start menu. Select your main system drive, click Configure, turn on system protection, and choose Create. Give the restore point a clear name, such as “Ethernet Settings.”
This step gives you a simple way to reverse system changes if a network adjustment causes connection problems, driver errors, or unexpected performance issues.
Step 2: Test Your Connection for Bufferbloat
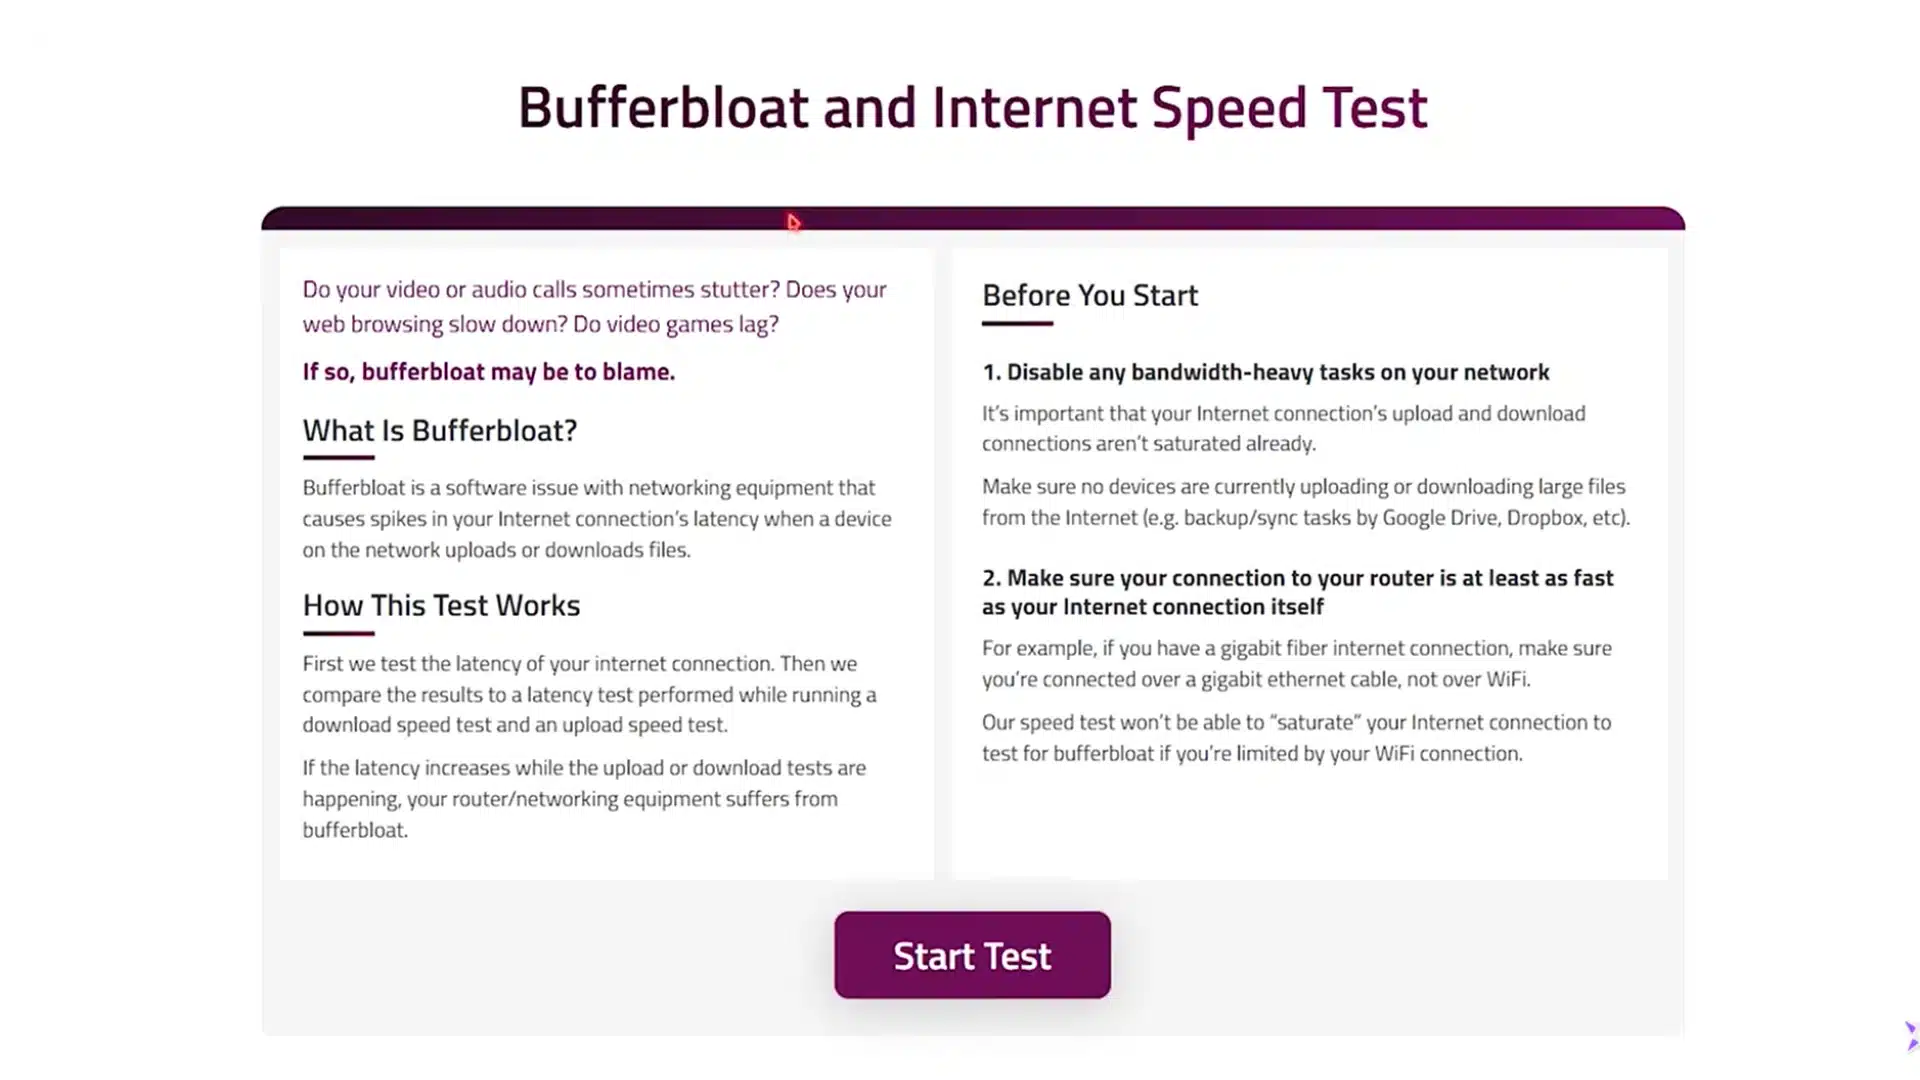
Restart your computer and close downloads, streaming services, cloud syncing tools, and background launchers. Run a bufferbloat test to measure your normal ping and how much latency increases while your connection is under heavy download or upload activity.
A poor result may point to router congestion rather than a Windows problem. Before editing advanced settings, consider enabling Smart Queue Management or Quality of Service through your router.
Step 3: Check Windows TCP and Adapter Settings
Open Command Prompt as an administrator and review the current TCP configuration before applying commands from online guides.
Disabling TCP autotuning is not automatically better and may reduce download performance on some connections, so avoid changing it without testing. Next, open Device Manager, select your Ethernet adapter, and update its driver.
Step 4: Disable Ethernet Power-Saving Features
Open Control Panel, select Network and Internet, and enter Network and Sharing Center. Click your Ethernet connection, choose Properties, select Configure, and open the Power Management tab. Uncheck the option that allows Windows to turn off the device.
You can also disable Energy Efficient Ethernet under the Advanced tab. These changes may prevent brief disconnections or latency spikes caused by the adapter entering a low-power state during light network activity.
Step 5: Choose and Test a Reliable DNS Server
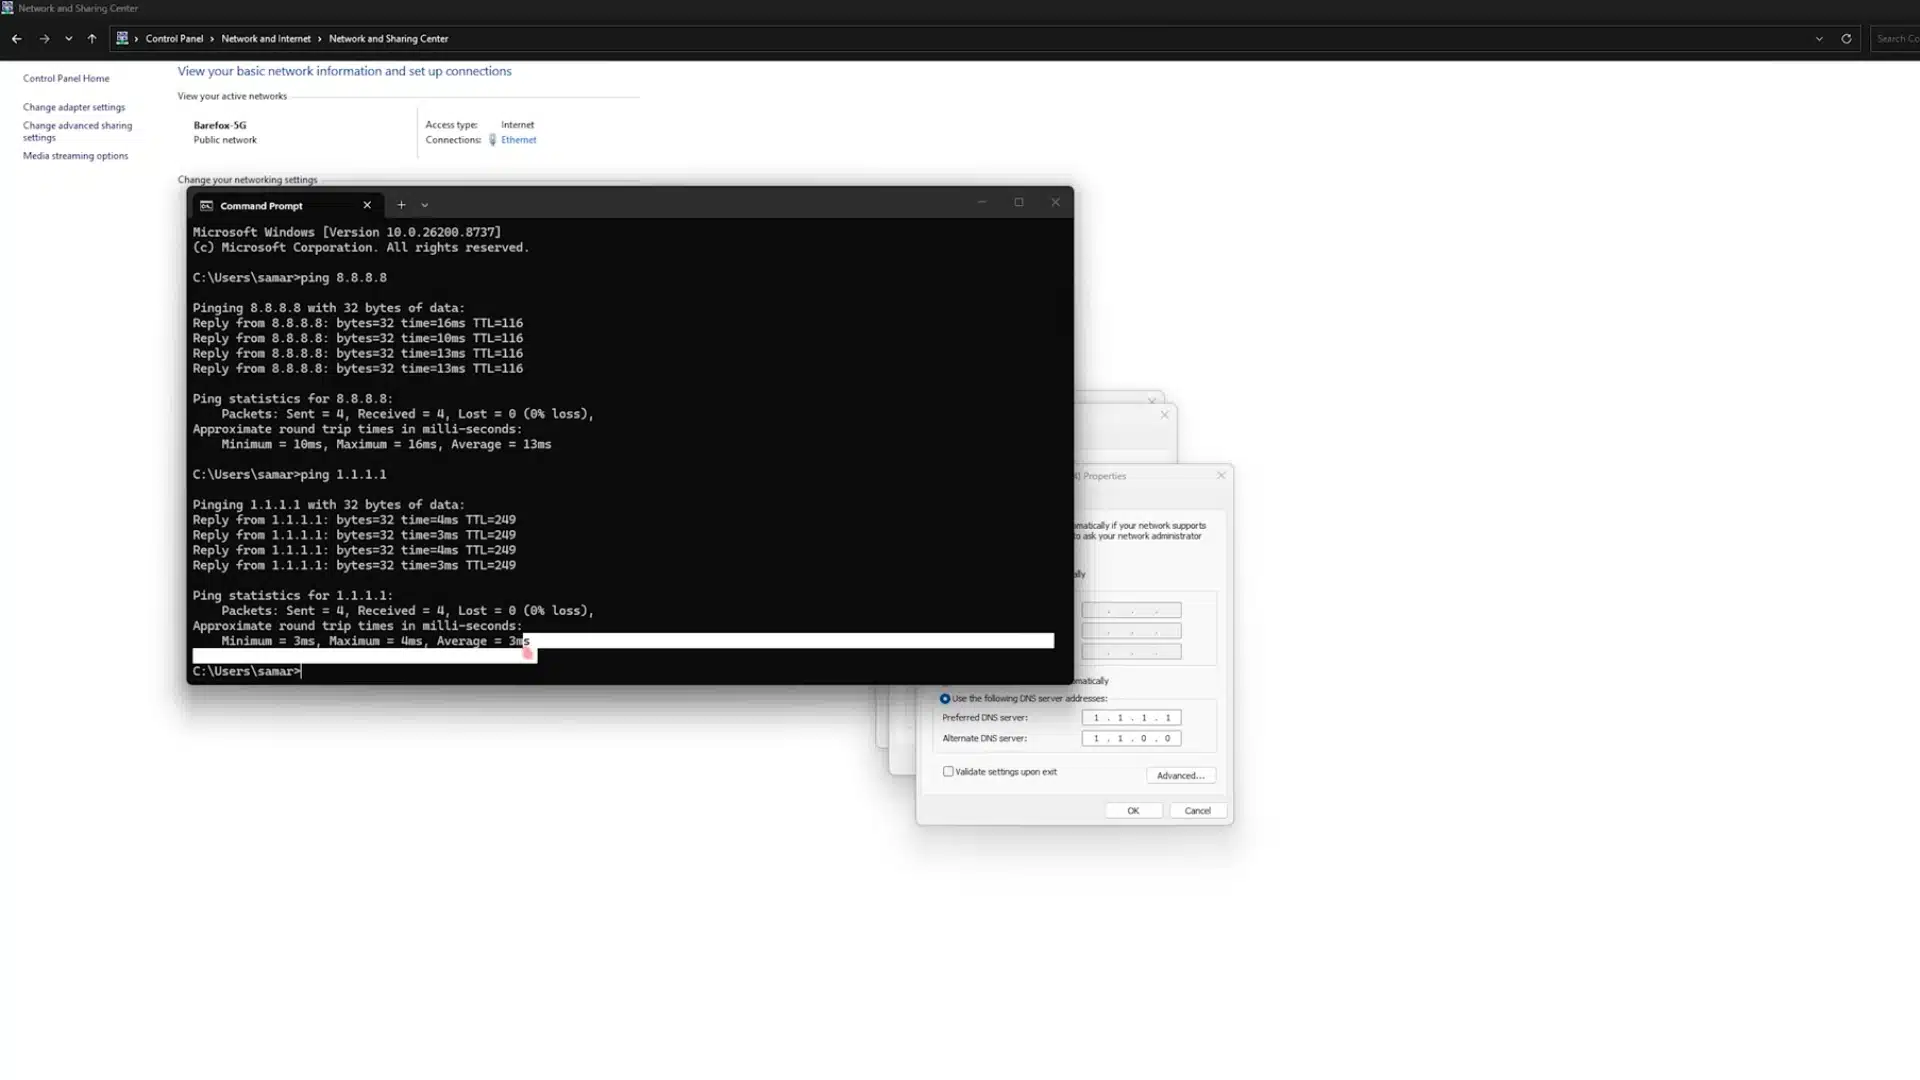
Open the Ethernet properties and select Internet Protocol Version 4. You can test Google DNS at 8.8.8.8 and Cloudflare DNS at 1.1.1.1 using Command Prompt, but remember that ping alone does not accurately measure DNS lookup speed.
Try each provider separately and check website loading, game sign-ins, and general stability. DNS changes may improve domain lookups, but they usually will not reduce in-game server latency significantly.
Step 6: Adjust Advanced Settings Carefully
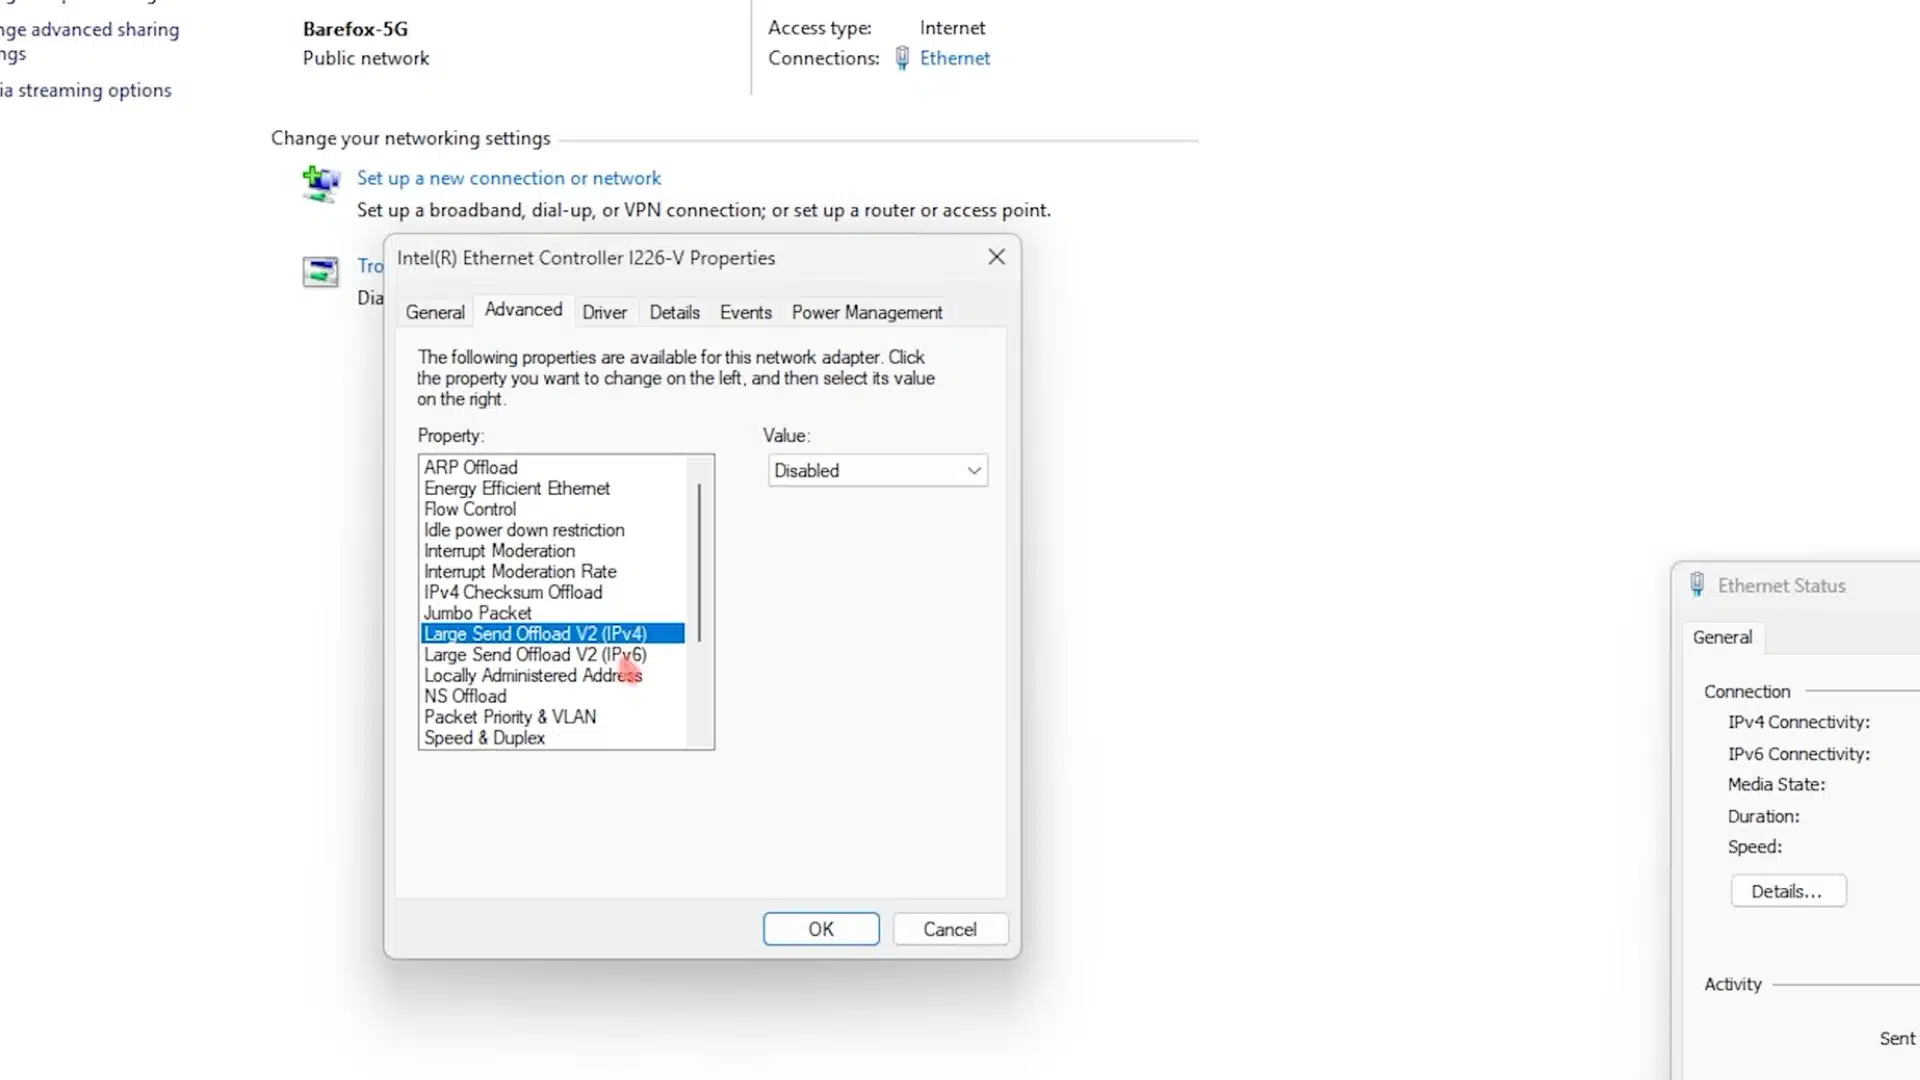
Open your Ethernet adapter’s Advanced tab and change only settings you understand. Keep Speed and Duplex on Auto Negotiation unless your network equipment requires something different.
Disabling power-saving options is generally safer than copying a complete preset from another computer.
For a complete walkthrough of the process, check out the video tutorial below:
Where These Fixes Stop Working
Some ping problems aren’t fixable from your side at all. Once you’ve done everything above, what’s left comes down to a few factors outside your control.
- ISP routing: Your provider decides how data travels to the game server. That decision happens outside your home network, and no local fix touches it.
- VPN or booster rerouting: These tools sometimes find a shorter path than your ISP’s default route. It’s not guaranteed, and it depends on your connection and location.
- Satellite connections: Signals have to travel up to a satellite and back down. That round trip adds delay no cable or setting can remove.
- Cellular connections: Data travels through cell towers instead of a direct wired line. This adds a latency floor that stays no matter what you change.
If you’ve tried every fix and your ping is still high, one of these is likely the reason. Knowing this helps you stop chasing a number you can’t actually reach.
Confirm Your Ping Actually Dropped
Comparing ping before and after only works if you test under the same conditions both times. Change too many variables, and you can’t tell what actually helped or if anything even worked.
Use the same tool for both tests, whether that’s your in-game ping display or a speed test site. Mixing tools makes the comparison meaningless, since each one measures slightly differently.
Test on the same server every time, ideally the closest one to you. Switching servers changes the distance your data travels, which affects your number separately from any fix.
Ping shifts naturally throughout the day as network traffic changes. Testing at 3 pm and comparing it to a peak evening result will skew your numbers, even if nothing else changed.
Run each test three or four times and take the average instead of trusting one reading. A single result can be an outlier caused by a brief, unrelated spike.
Wrapping Up
I’ve spent enough time fixing high ping to know that changing every setting at once rarely helps. Usually, the problem comes from your setup and server distance.
I work through each fix separately when checking how to get better ping. A wired connection, a nearby server, and less network traffic usually make the biggest difference. Test your ping after every change.
Keep the settings that work. If ping stays high, your internet type or server distance is likely the limit. Try these fixes tonight and check the result.
Frequently Asked Questions
Is 200 ping bad for gaming?
Yes, for most fast-paced games. Ping over 150ms causes noticeable input delay, and 200ms is high enough to affect timing-sensitive actions like aiming or blocking. Turn-based or slower games tolerate it better than shooters or fighting games.
Is 120 ping laggy?
It’s borderline. Competitive shooter players often notice input delay above 100ms, but 120ms is usually playable for casual matches. If actions feel delayed or hits don’t register accurately, it’s worth working through the fixes above rather than accepting it.
Is 2ms ping fast?
Yes, extremely. A 2ms ping usually means you’re on a wired connection very close to the server, often on the same local network or a nearby data center. This is close to the practical floor for online gaming and won’t cause noticeable delay.
Is 150 ping bad for gaming?
It’s borderline for competitive play. Many players notice input lag around 150ms, especially in fast shooters, though slower-paced games remain playable. If you’re consistently at this level, the wired connection and server-selection fixes above are the first things worth checking.